
Set up in-app automation triggers, goal evaluators, and custom fields
The survey configuration lets you get the project's automation URL and API key. You can also configure the project's customer satisfaction email notification and goal scores to track your performance.
Setting the automation status trigger
https://www.youtube.com/watch?v=-U_OXylSl1AClick Project settings > select Survey settings > select the Configure tab.
Under the Automation section, choose the status that triggers the survey to be sent to the users from the dropdown.

The status available from the dropdown is defined in the project's workflow. For more information, read this documentation.
An email will be sent to the customer once the status is achieved and automation is triggered. For more information, read our FAQ about these emails.
Enabling feedback custom fields
In the Feedback custom fields section, turn the toggle
 on to enable the feature. This will create three feedback custom fields.
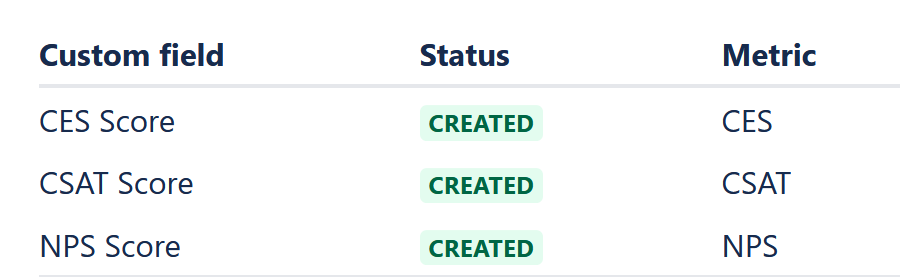
On your Jira Project, navigate to Custom fields. Find the custom fields below, then click and add them to the relevant screens using Screens and contexts. (More details are in the section Associate a custom field with multiple screens at once in the document How do you associate Fields with Screens)
CES Score
CSAT Score
NPS Score
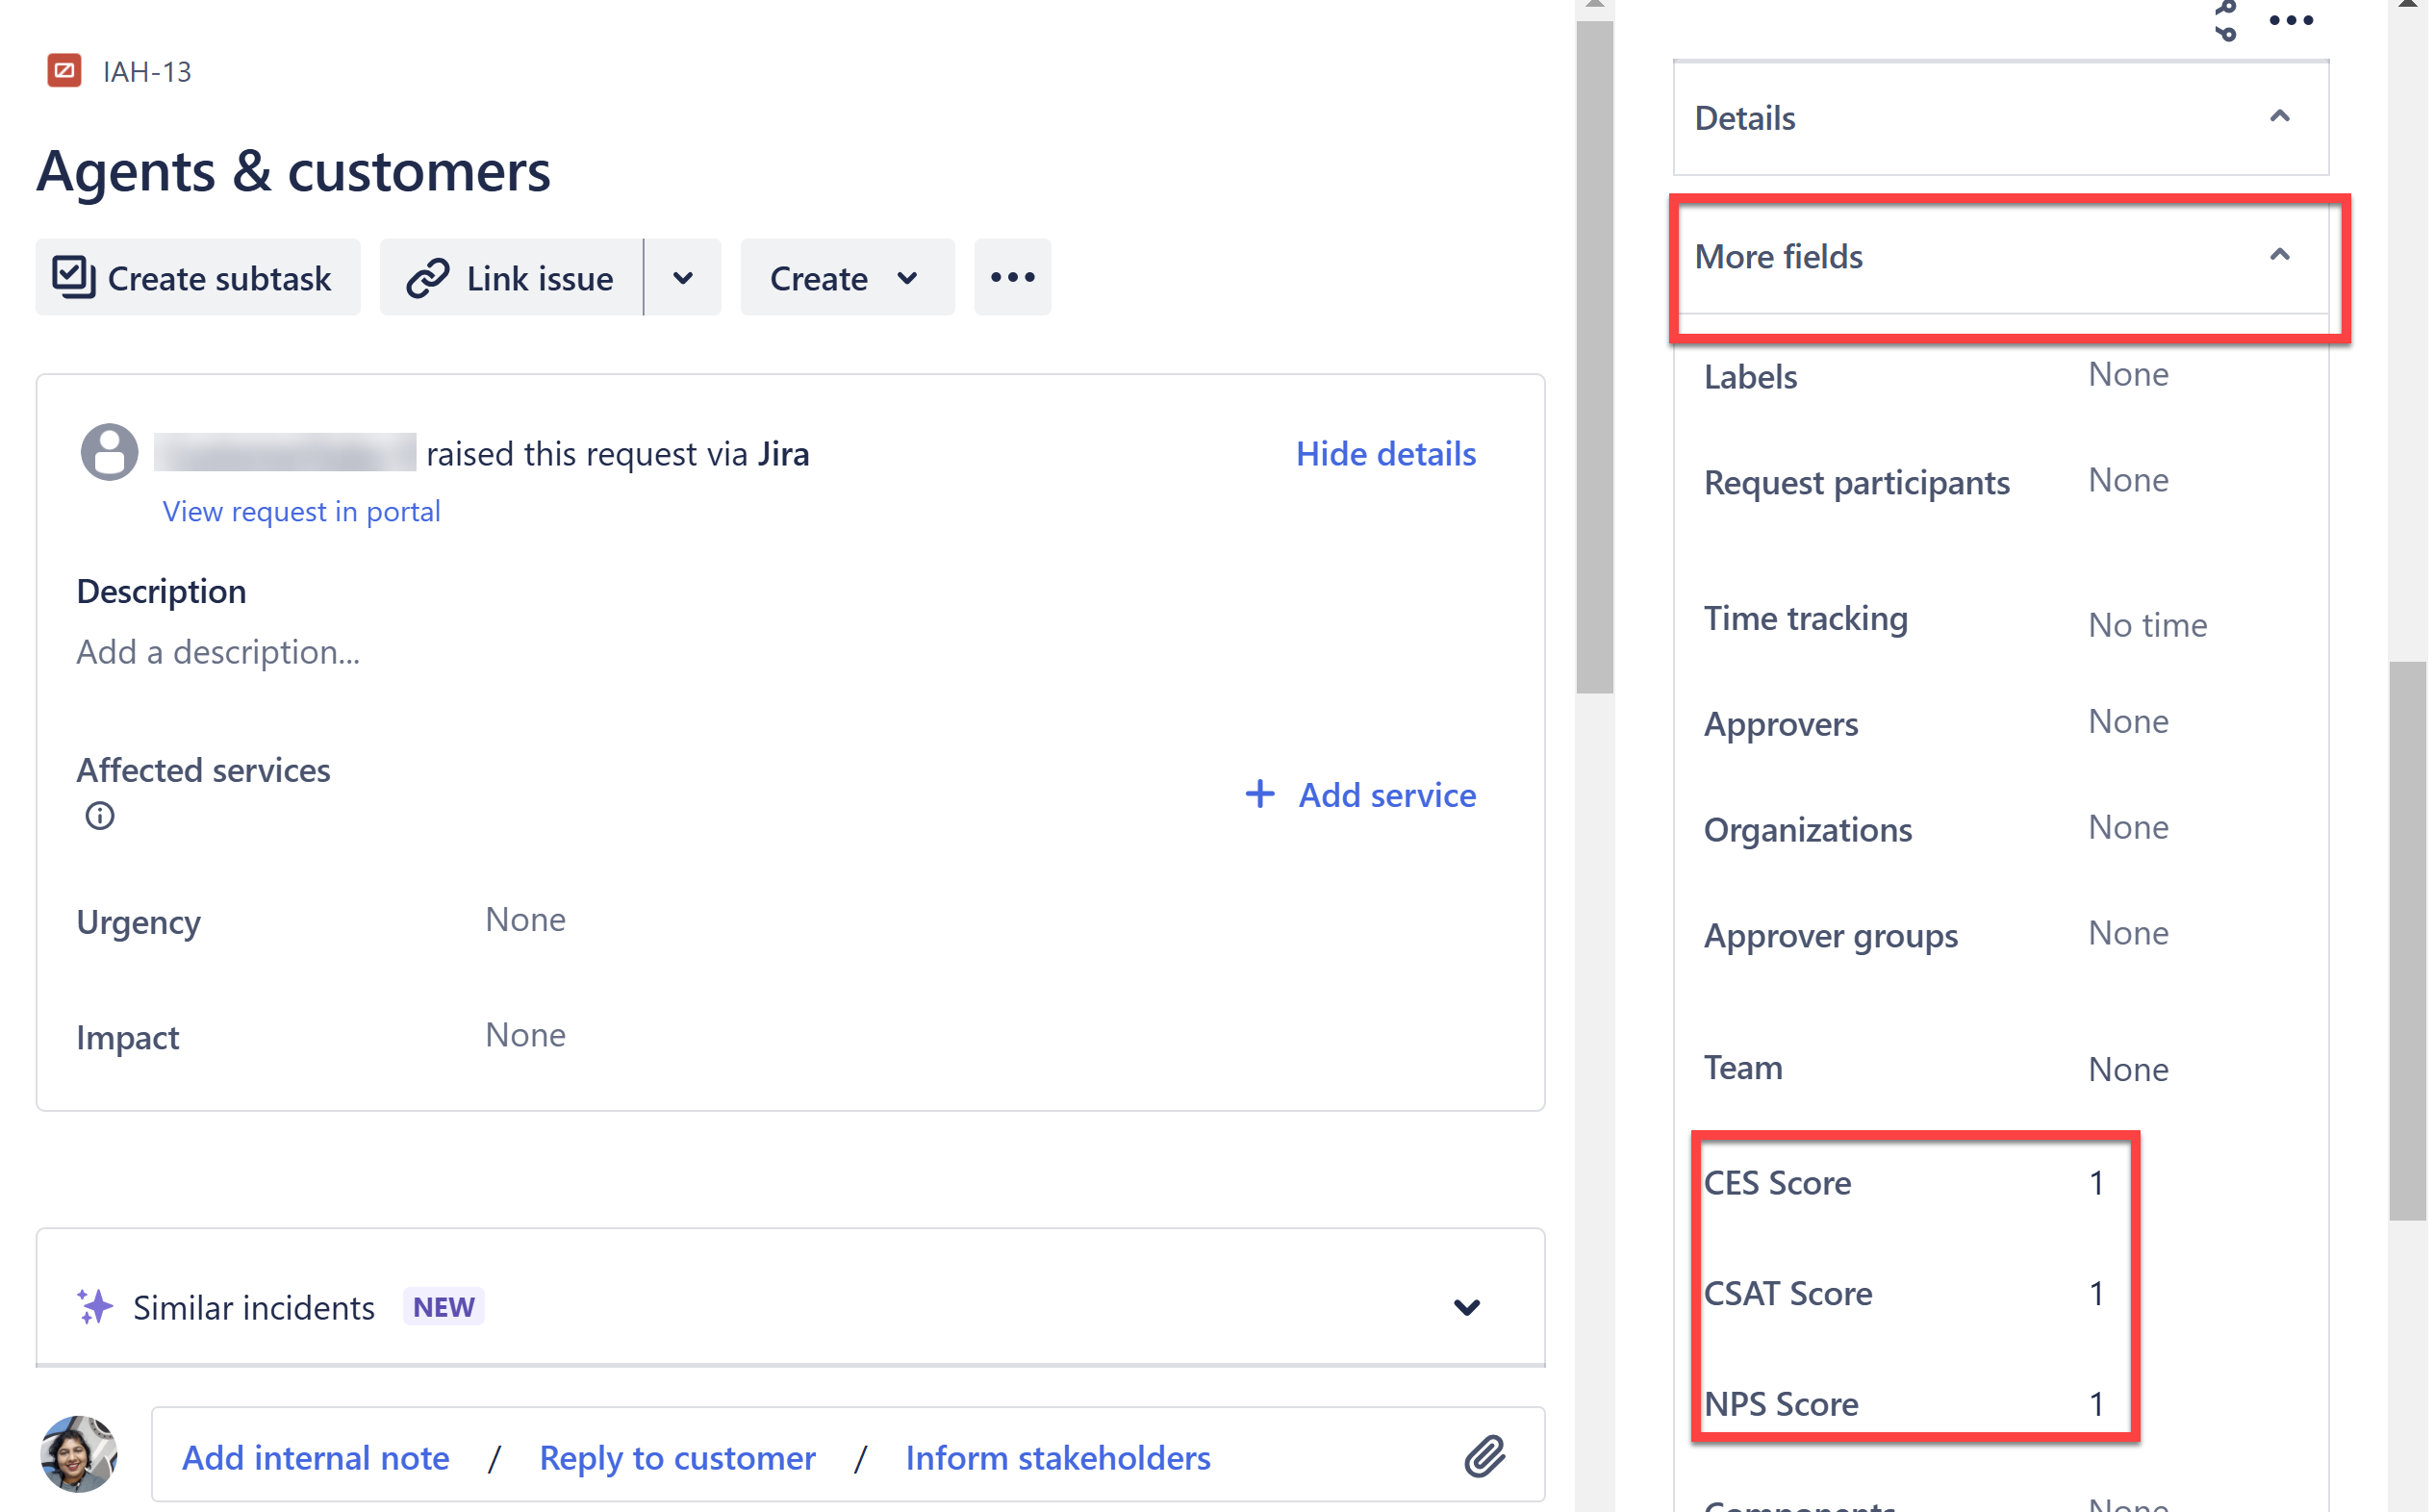
Once the setup is complete, you can now test this feature:
Make sure that there is a new survey response.
Browse to the survey’s Jira issue, then expand the Details or More fields sections to find the values for the scores above.
To learn more on how to use feedback custom fields with JSM, check out the following guides:
Setting goals to evaluate performance
Under the Goals configuration, set the value for NPS, CSat, and CES.
Click Back to project > Surveys report, to view the goal value.
Enabling API access
Click the Enable button to toggle the switch to
 . This will activate the API Key, which can be used to access your project's API endpoint.
Alternative automation
By default, the Alternative automation toggle is turned off.
Under the Alternative Automation section, click the copy icon, and capture the automation URL. Use the copied link in the Setting up the survey automation documentation.
Turn on the toggle after completing the steps in Setting up the survey automation.
Using the alternative automation, you can customize the automation to match your requirements. You can trigger the survey for a specific project, and schedule the automation to trigger at a specific time to name a few.
Check out our guides that cover alternative automation settings that you can configure:
What's next
We’re continuously enhancing the JSM Survey app with features inspired by your valuable feedback. While we work on updating our videos to reflect these improvements, you may notice some differences in the steps shown.