
End-of-Life Notice: Surveys for Jira Service Management will be discontinued on October 30, 2026. After this date, the app will be removed from the Atlassian Marketplace and will cease to function. To ensure a smooth transition, please export your survey data and explore alternative solutions before the sunset date.
You can retrieve your survey responses via API or export from CES, CSAT and NPS reports via the Export All Scales feature.
Background
In this scenario, Alex, a Service Desk agent, and Jira administrator, aims to utilize feedback custom fields from the Customer Improvement project (CI) to develop JQL queries, filters, alerts, and dashboards. Additionally, Alex plans to automate email notifications to all Jira administrators when a low NPS score is received in a survey.
Prerequisites
-
You have configured a custom dashboard.
-
You have enabled the feedback custom field. Refer to this documentation: Enabling custom fields.
-
You have added the feedback custom fields to the issue view and issue edit screen.
Building a JQL query
The user Alex wants to search for issues that meet the following requirements:
-
Issues in the CI project
-
Issues assigned to the user Alex
-
Issues with CES Score that have a score of 3 and above
-
Issues with CSAT Score that have a score of 4 and above
-
Issues with NPS Score that have a score of 4 and above
-
Log in to Jira.
-
Click Filters > View all issues.
-
Click JQL to switch to advanced search if the basic search bar is shown.
"ces score[number]" >= "3" AND "CSAT Score[Number]" >= "4" AND "NPS Score[Number]" >= "4" AND project = CI ORDER BY created DESC -
Next, click Export issues > Export Excel CSV, to generate a report.
Creating a filter
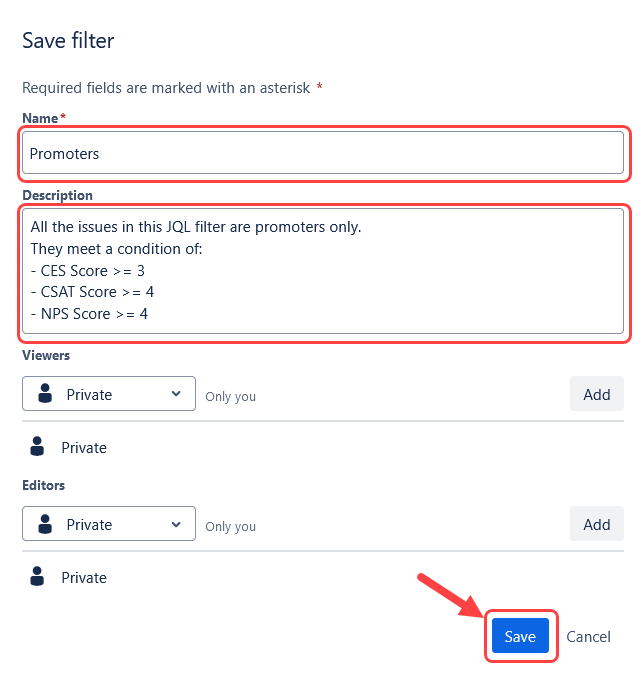
Using the JQL query in the previous section, Alex wants to save it as a filter named “Promoters”.
-
On the same page, click Save filter.
-
Enter “Promoters” in the window, add a description, and click Save.
For more information on filters, check out these guides:
Creating a dashboard gadget
After the filter has been saved. Alex wants to create a dashboard gadget with the “Promoters” filter.
-
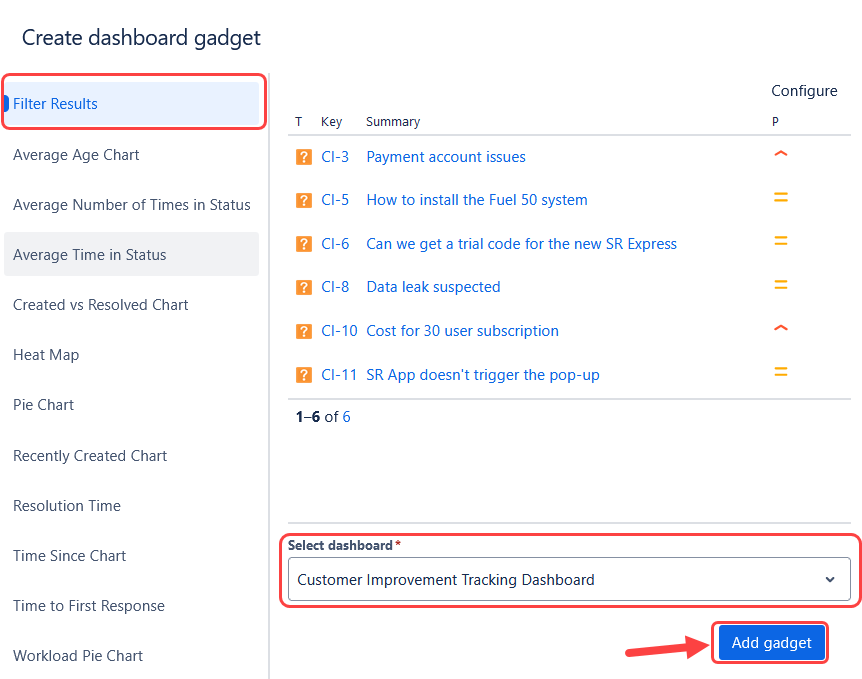
On the same page, click Export issues > Create dashboard gadget.
-
By default, the Filter Results gadget will be chosen.
-
Under Select dashboard, search and select for your custom dashboard. In this example, the custom dashboard “Customer Improvement Tracking Dashboard” is chosen.
-
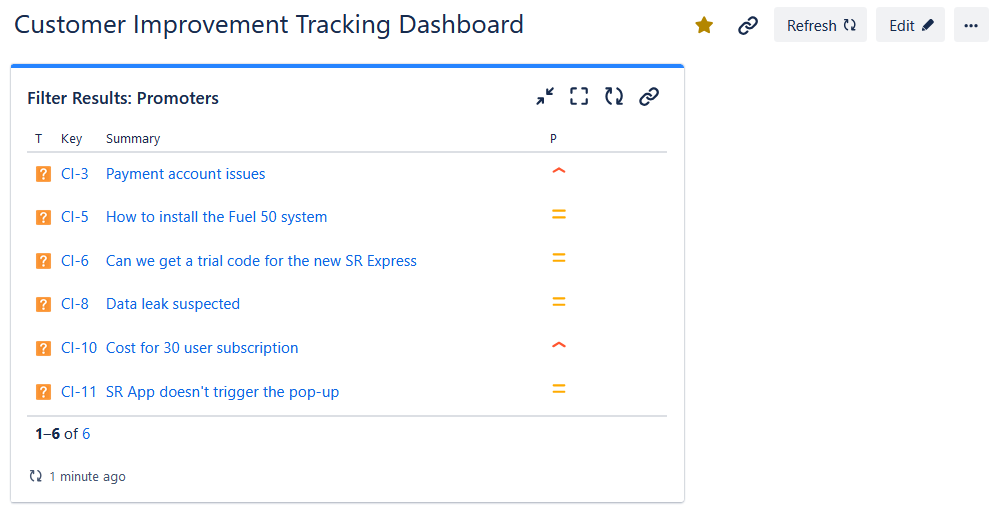
Click Add gadget. You will be directed to your custom dashboard.
-
Click Done to confirm your changes.
For more information on gadgets and dashboards, check out these guides:
Creating an automation
-
In your project, select Project settings > Automation.
-
Select Create rule to start creating the automation rule.
-
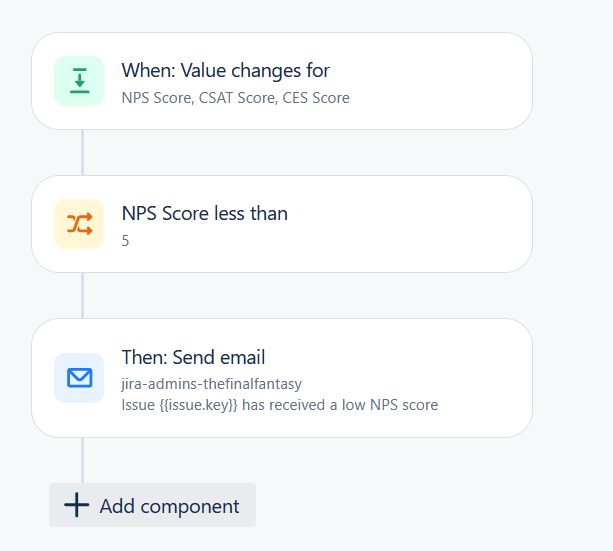
Select Field value changed and fill in the following:
-
Fields to monitor for changes: NPS Score
-
Change type: Value added
-
For: Leave it as “all issue operations”.
-
-
Click Next to add the next component.
-
Click Add component > If: Add a condition > Issue fields condition and fill in the following:
-
Field: NPS Score
-
Condition: less than
-
Value: 5
-
-
Click Next and add a second component. Click Add component > THEN: Add an action > Send email. Fill in the following:
-
To: jira-adminis (the recipients you want to notify when an issue receives a low NPS score.
-
Subject: Issue {{issue.key}} has received a low NPS score
-
Content: This ticket will be labeled for review during our monthly CI team performance review meeting.
-
-
Name the automation and click Turn on rule to activate the automation.