Alternative automation for Surveys for JSM
Prerequisites

This video will guide administrators of Jira instances to ensure they are working on a cloud instance with valid request types and prepare URLs for the next steps.
Automation will only work with the following conditions:
Issues are on the JSM cloud site. You can use the steps at https://confluence.atlassian.com/jirakb/how-to-check-your-jira-cloud-version-1272283464.html as a reference.
Issues have a valid request type.
If you are unsure which request type is available on your Project, please go to Project Settings > Request Types, to get a list of all the request types for your Project.
A Jira issue key must be used for validating the automation.
Getting the project's automation URL
Click Project settings > select Survey settings > select the Configure tab.
Under the Alternative Automation section, click the copy icon and capture the automation URL. This URL will be used in the automation step later in the configuration.
Jira Automation configuration steps

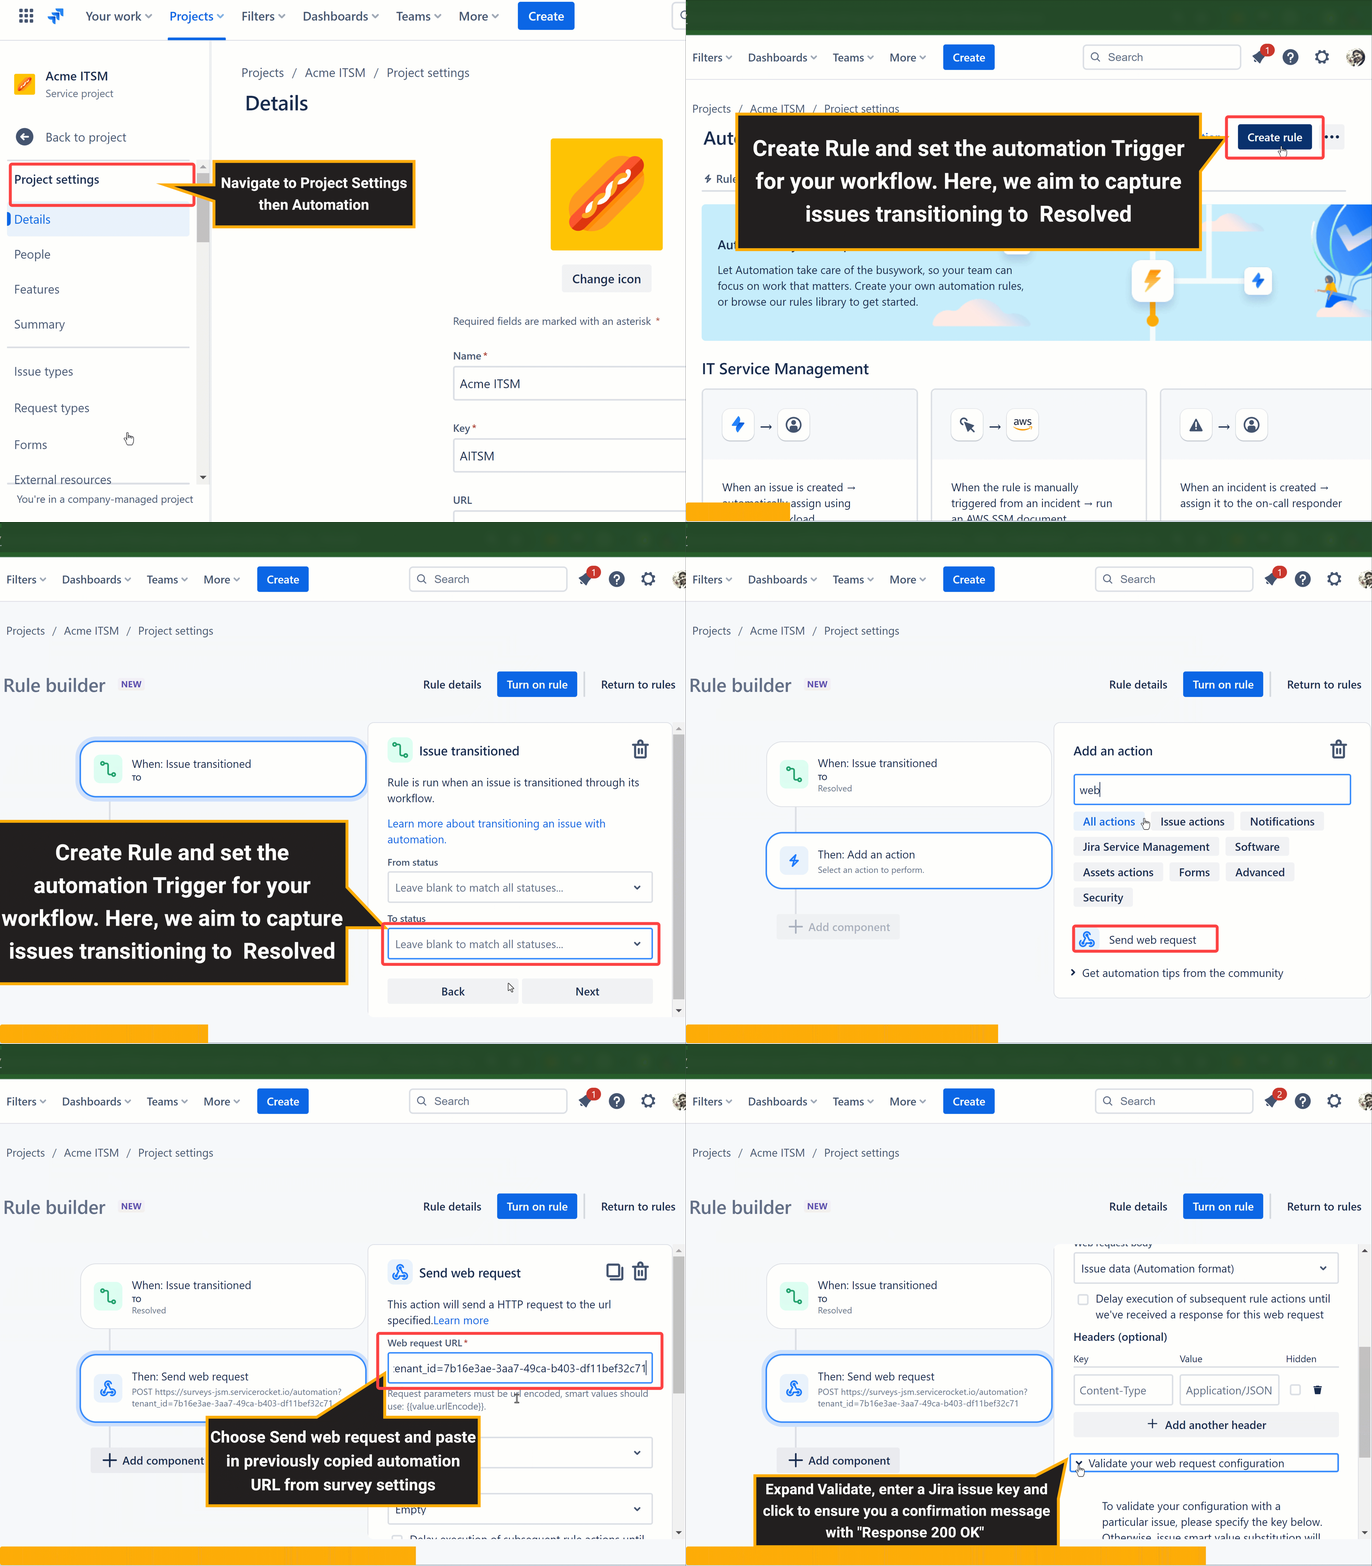
In your project, select Project settings > Automation.
Select Create rule to start creating the automation rule.
In the Add a trigger section, select a suitable trigger for your workflow. For this example, we are using Issue transitioned, the "From Status" is blank while the "To Status" has the Resolved value. Click Next to continue.
In the Add an action section, select Send web request.
Paste the automation URL from the project's Configure tab (refer to Modifying the survey configuration) into the Web request URL field.
Select the “POST” option for the HTTP method.
Choose Issue data(Automation format) from the dropdown. Then, click Validate your web request configuration to expand that section.
In the expanded "Validate" section, enter a Jira issue key and click on Validate. Next, click Save to continue.
 If successful, you will see a confirmation message with "Response 200 OK". You should also refresh the Jira issue and check if there is a new comment with a survey link.
Provide a suitable name for the automation rule when turning it on.
Using the alternative automation, you can customize the automation to match your requirements. You can trigger the survey for a specific project, and schedule the automation to trigger at a specific time to name a few.
Check out our guides that cover alternative automation settings that you can configure:
