Skip table of contents

Quick start for JSM Survey Administrators

In this quick start guide, we’ll walk you through simple customizations that will familiarize you with Surveys for Jira Service Management app.

We are constantly improving this page and are happy to hear your feedback. For an in-depth look at the Survey for JSM features, read our documentation in the Related Content section. We also provided you some quick reference on the steps below.


Building the survey content

In your role as an administrator of your organization’s instance, you will start here to set up questions. You can set up more than one language.

Here are some quick gifs on these steps to build the survey questions

Steps

Visuals

Configuring questions

  1. Go to the Manage Apps window and click on Get started under Surveys for JSM on the left-hand menu. Alternatively, you can also click on the Get started button in the Surveys for JSM section.

  2. Click Project settings >Survey settings at the sidebar.

  3. In the Questions section, enable the feedback questions that you require. 

  4. Change the order of the questions.

Configuring languages

  1. In the Build tab, scroll to the Language section.

  2. Select the language you want to configure from the dropdown menu. You can drag and drop the languages and order them however you want.

  3. Click the downwards pointing arrow to expand the configuration for the chosen language. 

Editing elements

  1. The following content can be edited within the language form:

    1. Survey title: Provide the title of the survey that you want to create.

    2. Automated issue reply: Add the automated comment with a markdown that links to the survey within the email notification body. Edit the content of the email as needed.

    3. Email Subject: Set the subject for the email with the link to the survey that the customers receive.

Configuring Questions

  1. Set the description for your survey's NPS, CSAT, CES, and comment.

Configuring the success message and button labels

  1. Success Message: Set the success message to appear once the user has submitted the survey.

  2. Button labels: Personalize and design the Submit button, Done button, and Done button URL.

Repeat the language setup steps for the additional language. In this example, you will set up your own questions for the Portuguese language.

Click Preview on the top right of the page to preview the changes you have made.


Customizing the look and feel

This is where you should start if you want to change the look and feel with customized icons or images.

More detailed step by step for instructions for customization

Steps

Visuals

Selecting the icon set

  1. Click the Customize tab to design your survey’s appearance.

  2. Under the Icons section, click the dropdown option and select a set of icons.

Uploading the logo

  1. For the logo, click Update to upload an image of the logo. Click Save to save the changes.

Choosing the banner color

  1. Next, scroll to the Banner color section and click Choose Color to add some color to your banner.

  2. The chosen banner color is reflected in the Choose color wording for a better view of the color.

Toggling the success message

  1. Scroll a little further to the Success Image section. Click the Show success image button to toggle the feature on.

  2. Click Preview on the top right of the page to preview the changes you have made.

  3. With the finishing touches of your banner design complete, it’s time to move to the next tab.


Configuring the automation

Check out this topic for steps on how and when the surveys should be sent.

Step by step on how to automate your survey

Steps

Visuals

Setting up the automation trigger

  1. Click the Configure tab to set up the automation triggers, goal configurations, and API access.

  2. By default, the Automation toggle is turned on.

  3. Choose the status that triggers the survey to be sent to the users from the dropdown.

Setting survey goals

  1. Set the NPS, CSat, and CES value for the project’s survey goals.

  2. For more information on survey report metrics, check out Viewing a survey report.

  3. With this complete, we can move to the final tab of the survey settings.


Configuring the email triggers

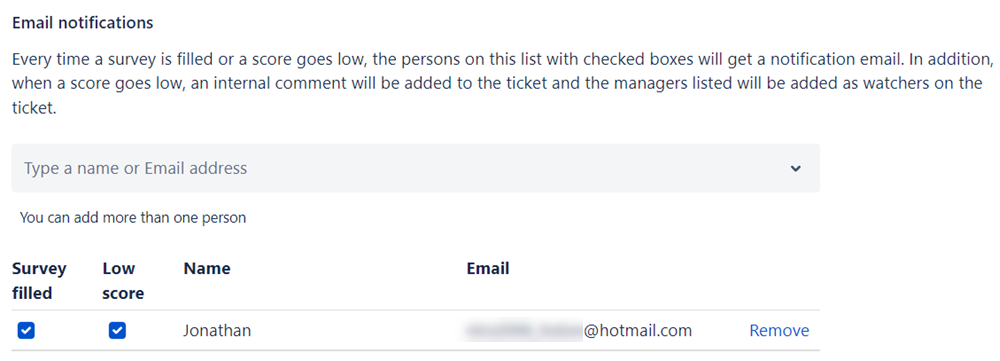
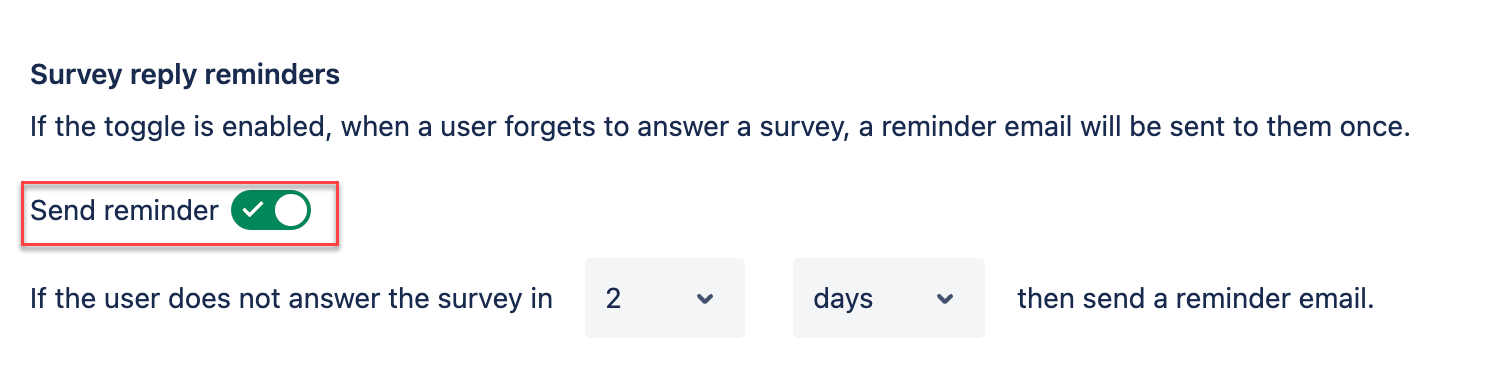
Also, check out Configuring the email triggers. These are steps to take if your stakeholders want to be notified of low scores. You can also set up a survey reply at this step.

Quick instruction to setup email triggers

Steps

Visuals

Configuring performance notification

  1. Click the Email Configuration tab to configure the performance notification and set survey reply reminders.

  2. Insert the name or email address of the users that you want to notify.   

  3. Check the boxes if you want the user to receive notifications for surveys filled and/or low scores.

Setting survey reply reminders

  1. Set the survey reminder intervals as to when the reminder email is to be sent to users.

  2. Turn the toggle on to activate the send reminder feature.

  3. Congratulations! You have reached the end of the survey setting configuration.

  4. Click the Preview button one last time to view your survey design and content.


Related content

Building the survey’s questions and languages

Customizing the look and feel of your survey

Modifying the survey configuration

Configuring email settings

Complete playlist of JSM Survey quick start videos

JavaScript errors detected

Please note, these errors can depend on your browser setup.

If this problem persists, please contact our support.