Working with appointments as a Service Desk agent
Viewing and managing appointments in Jira Service Management as a Service Desk agent.
Any Service Desk agent that accesses the Scheduler for JSM app for the first time will have to provide access to their Google account. For more information, read the Granting Scheduler for JSM to access your Google account documentation.
Understanding the appointment tabs
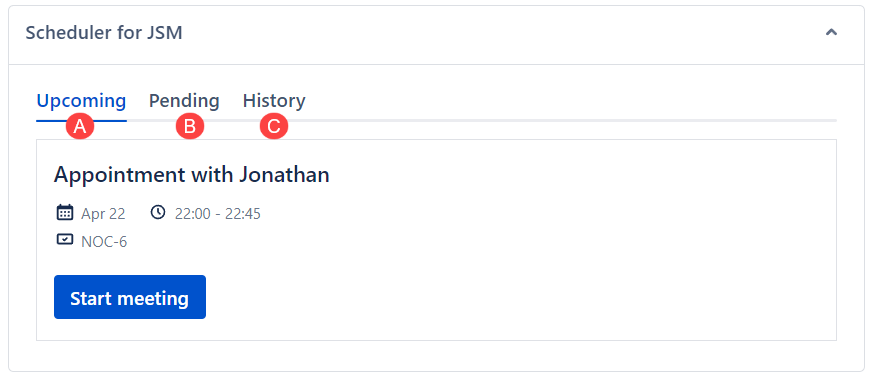
There are three tabs in the Scheduler for the JSM panel:

Upcoming – Appointments that the Service Desk agent has accepted. Meetings can be started from this tab.
Pending – Appointments that the Service Desk agent has not decided on. The agent can accept or decline the appointment.
History – The appointment history of this issue.
Accepting an appointment
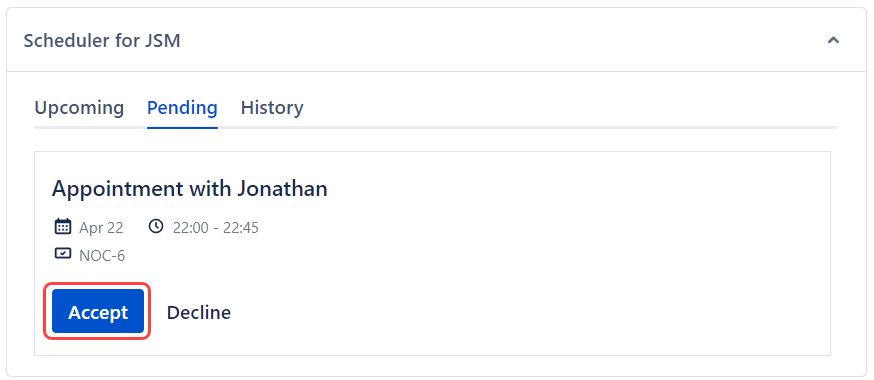
In the Scheduler for JSM panel, under the Pending tab, click Accept.

The meeting details will now appear in the Upcoming tab.
Declining an appointment
Declining an appointment in the Pending tab
In the Scheduler for JSM panel, under the Pending tab, click Decline. A confirmation window will open.
Enter a message to let your customer know why you declined.
Click Confirm to confirm the appointment cancellation action.
You can check the details of the declined meeting in the History tab.
Declining an appointment in the Upcoming tab
In the Scheduler for JSM panel, under the Upcoming tab, click Decline. A confirmation window will open.
Enter a message to let your customer know why you declined.
Click Confirm to confirm the appointment cancellation action.
The agent will automatically decline the Google Calendar event.
You can check the details of the declined meeting in the History tab.
Rescheduling an appointment
Rescheduling an appointment in the Pending tab
In the Scheduler for JSM panel, under the Pending tab, click Reschedule. A confirmation window will open.
Fill in the new date and time for the meeting.
You can change the pre-populated email to another customer’s email.
Enter a message to let your customer know why you rescheduled.
Click Reschedule to confirm the appointment reschedule action.
A Google Calendar event is created with the new meeting details.
Rescheduling an appointment in the Upcoming tab
In the Scheduler for JSM panel, under the Upcoming tab, click Reschedule. A confirmation window will open.
Fill in the new date and time for the meeting.
You can change the pre-populated email to another customer’s email.
Enter a message to let your customer know why you rescheduled.
Click Reschedule to confirm the appointment reschedule action.
The Google Calendar event is updated with the new meeting details.
Rescheduling an appointment without an auto-generated meeting link
Click Reschedule on either the Upcoming or Pending tab and a window will open.
You’ll be notified in the window that no meeting link is attached. Check your ticket or calendar for the shared link.
You need to reschedule using the issue’s comment section.
Starting an appointment
Starting an appointment with an auto-generated meeting link
You turned on the Auto-generate meeting link toggle in your Session configuration.
In the Scheduler for JSM panel, under the Upcoming tab, click Start meeting.
In the window, click Continue to commence the meeting via Google Meet.
Starting an appointment without an auto-generated meeting link
In this case, the Service Desk agent shared the meeting link with the customer in the issue’s comment section.
You turned off the Auto-generate meeting link toggle in your Session configuration.
In the Scheduler for JSM panel, under the Upcoming tab, click Start meeting.
You’ll be notified in the window that no meeting link is attached. Check your ticket or calendar for the shared link.
Viewing appointment history
In the Scheduler for JSM panel, you can view the appointment history under the History tab.
The following status icons are used to represent the status of the request:Completed
 – This icon means the appointment has been completed.
Expired
 – This icon means the request is overdue and the appointment has expired.
Declined
 – This icon means the appointment has been declined.
