
Create sessions to set clear expectations for your agents.
Setting up the appointment session
-
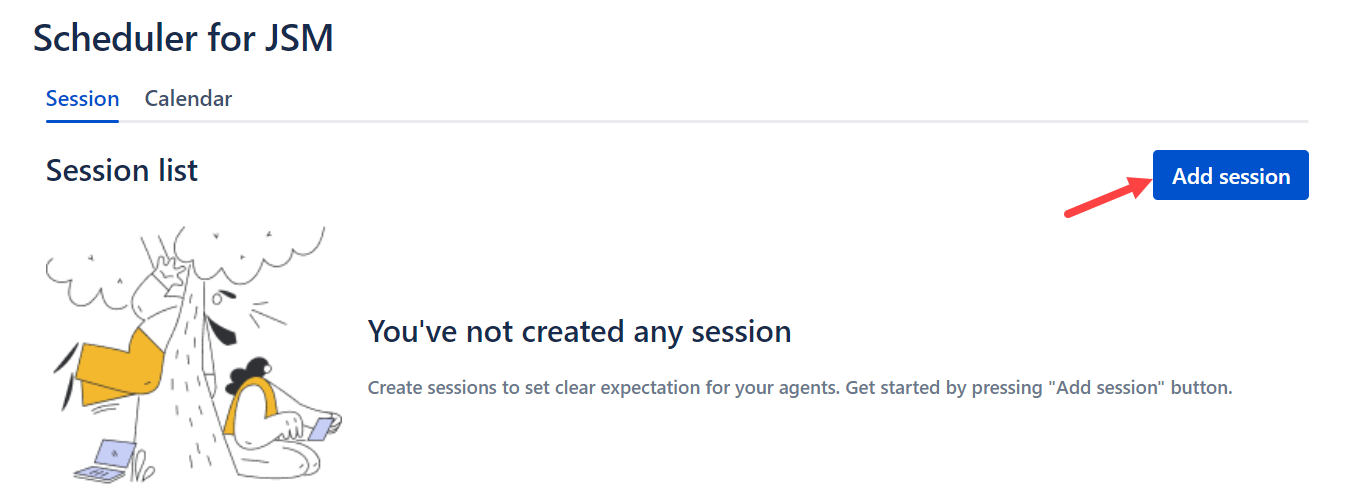
Click Add session to start the configuration.
-
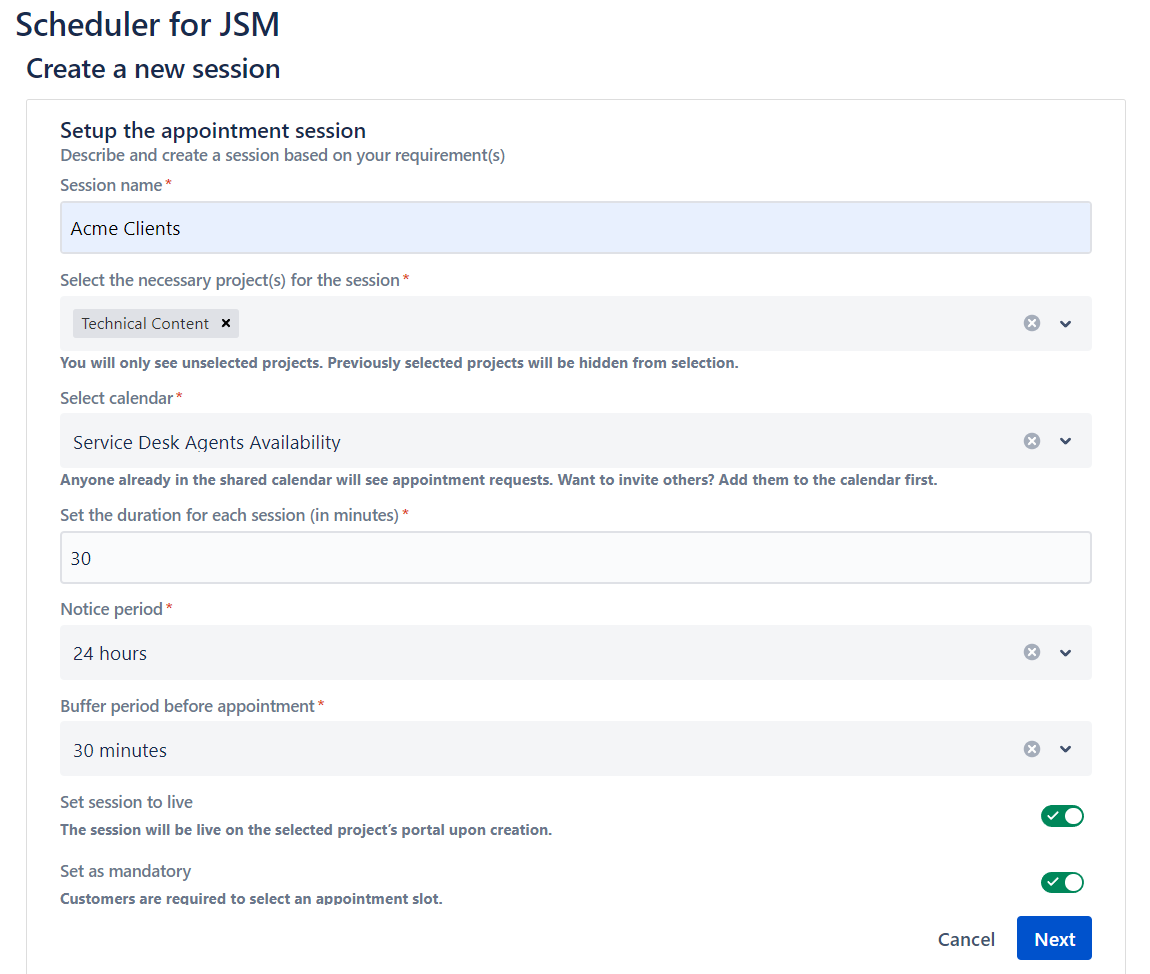
In the Create a new session page, fill in the fields in the Setup the appointment session form.
|
Field |
Description |
Required |
|---|---|---|
|
Session name |
The name of the session. |
|
|
Select the project for the session |
The project(s) that the session is used for. You can select more than one project. Previously selected projects by other sessions cannot be viewed anymore. |
|
|
Select calendar |
Choose from the calendars you have configured |
|
|
Set the duration for session (in minutes) |
The duration of the appointment session before it expires. |
|
|
Notice period |
The earliest slot the customer can book an appointment. Example: If the notice period is configured as 2 days, customers are limited to booking appointment slots commencing 2 days from the current day. |
|
|
Buffer period before appointment |
The buffer period for scheduling the next appointment after the end of the current appointment. Example: A customer has booked an appointment at 3:00 PM, the duration of the appointment session is 30 minutes, and the buffer period is set to 30 minutes. Therefore, after the appointment ends at 3:30 PM, the customer can only book the next appointment slot from 4:00 PM onwards. |
|
|
Set session to live |
To set whether the session will go live on the selected project’s portal upon creation. |
|
|
Set as mandatory |
To set whether customers are required to schedule appointments for each of their requests. |
|
|
Auto-generate meeting link |
To set whether a meeting link will be automatically generated for each appointment. |
|
-
Click Next after you have filled in the form details.
Setting the availability for the session
-
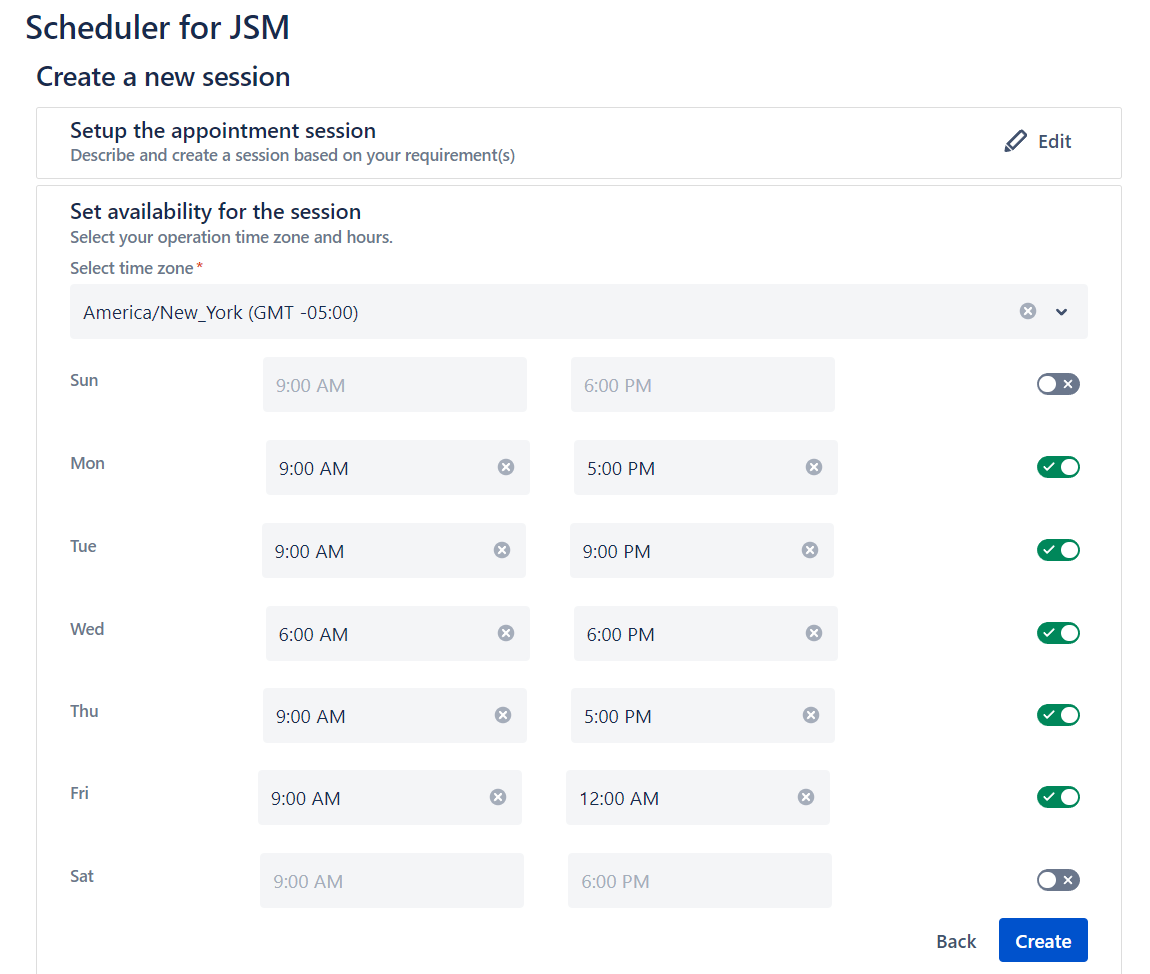
Select the timezone and set your team’s weekly availability in the Set availability for the session form.
You can turn off the toggle for the days when your team does not work.
-
Click Create to complete the session configuration. You’ve done it! Your customers can now book appointments via the customer portal.
Editing a session
-
In the Session tab, click the gear icon for the session you want to edit.
-
Click Edit session to edit your existing configuration.
Turning a session off
-
In the Session tab, click the gear icon for the session you want to turn off.
-
Click Set session to off.
-
The session name will have the X Off status to indicate that the session is not active anymore.