Creating an account plan
For the best experience, consider creating one board per account planning. Avoid doing multiple account planning within a single Miroverse template.
What is account planning?
Account planning empowers sales teams to strategically secure and maintain business from specific customer accounts. Participants gather detailed account information—business goals, challenges, decision-making processes, and competitive context.
Import Salesforce Accounts, Contacts, Leads, and Opportunities into this template with Salesforce for Miro
Overview
In this template, we break down the account planning into 3 steps to better visualize your account planning. We recommend creating one board for each account you plan for.

Account overview
Map out key information about your customer account.
Account plan
Chart your team's ongoing and planned actions for winning this customer's business.
Account map
Identify your leads and consider how they might either assist or block your deal-closing efforts.
Who should be involved?
Account planning is typically a team activity and considers diverse perspectives of the individuals that align with the sales strategy.
Account executives
Responsible for managing the overall account relationship and executing the sales strategy.
Sales managers
Provide guidance and support to account executives and oversee the account planning process.
Marketing representatives
Contribute insights into the target market, competitive landscape, and messaging.
Customer success managers
Provide input on customer needs and challenges.
Subject matter experts
Offer expertise on the product or service being sold.
Why use this template?
Effective account planning enables your team to gain deeper insights into your customers, allowing for a customized and strategic approach.
Deep customer understanding
Gain a comprehensive understanding of the customer's business, goals, challenges, key stakeholders, and their decision-making processes.
Tailored sales strategy
Develop a customized sales strategy that addresses the customer's specific needs and pain points.
Stronger relationships
Build stronger relationships with key decision-makers within the customer organization.
Increased sales effectiveness
Prioritize accounts with the highest potential for success to drive revenue growth.
Planning an account can be complex, especially if it’s your first time. Use this template to get visual clarity on the collaboration with a structured approach and let this template be a great asset in aligning your strategy!
Step 1: Account overview
Account profile
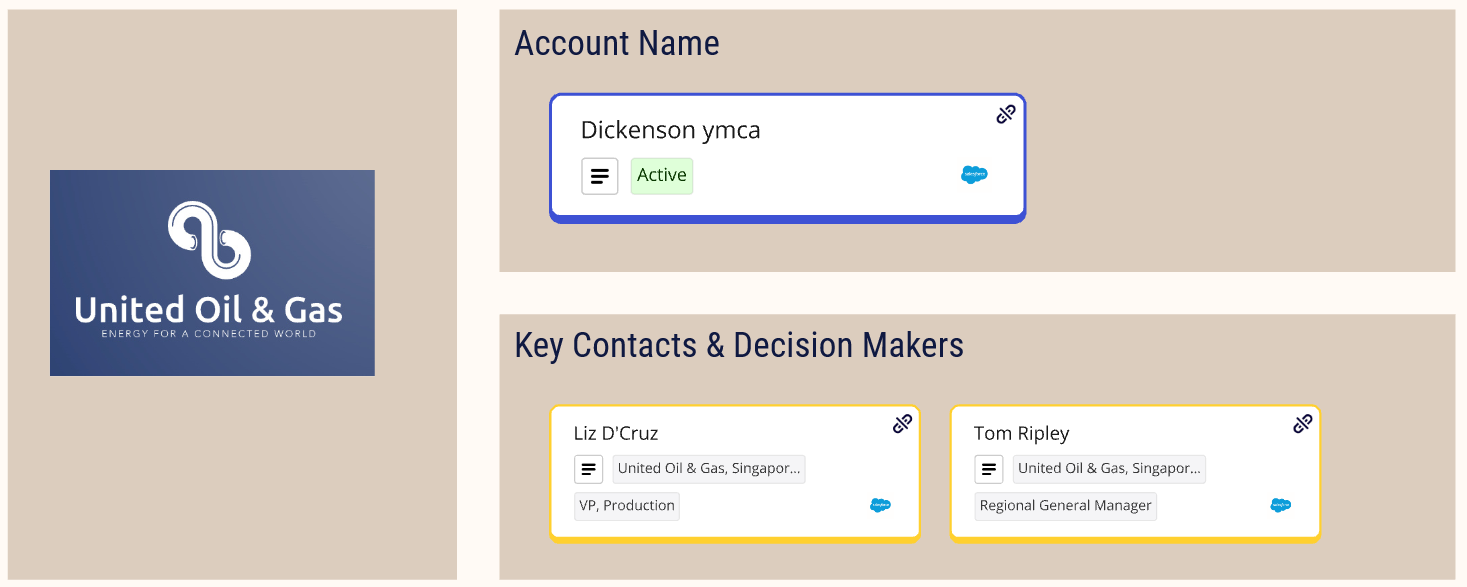
Fill in the key information of your customer account.
Insert an image of the customer account’s company logo
Create and insert account cards to identify the account name
Create and insert contact cards to identify the key contacts and decision-makers
Account team: owners & stakeholders
List out who in your team will drive this customer account to success.

Use the sticky notes provided to insert the team members.
Game plan
Create goals to set the course, lay out an action plan to turn sales opportunities into victories, and create action plans to convert your goals and sales opportunities into a reality.

Insert a goal that you have for the customer account
Search Salesforce via the Salesforce for Miro app and insert relevant opportunity cards
Use a sticky note to summarize your action plan, with key information such as:
Short description
Assigned (owner)
Deadline
Resources & collaterals
List down the resources and collaterals that your team will refer to often.
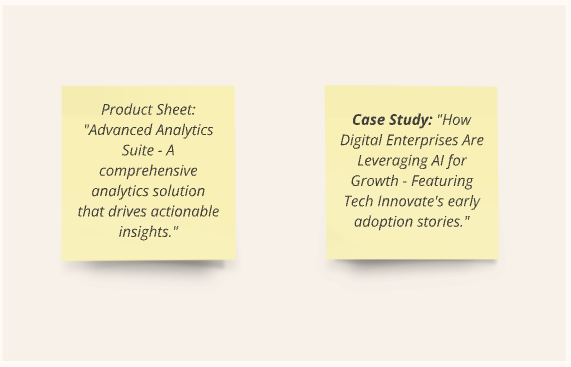
Use the sticky notes to insert your resources and collaterals.
Meeting notes
Write down the meeting notes that your team has discussed recently.

Pre-filled meeting notes are available on the template. Use the following key information to write your meeting notes:
Meeting date
Key points discussed
Next steps
Step 2: Account plan
Account goals
Create account goals to list down what you aim to achieve with the customer account.
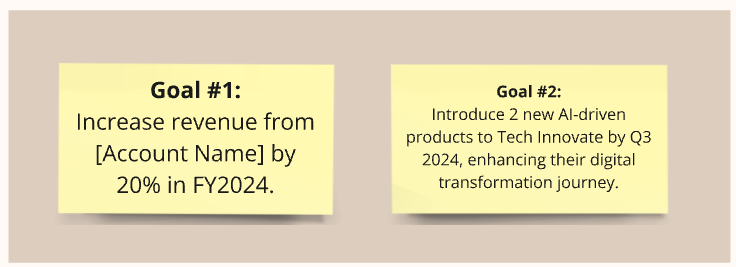
Use sticky notes to insert your goals. Use a numbering system to keep track of the number of goals you have for this account. For example, Goal #1, Goal #2, and so on.
Deal stages
Define the type of stages your team must go through to close a deal.

Use the sticky notes to create a deal stage. Replace the content with your information.
Use the arrow shape to show the advancement of the deal stages from left to right.
Partner team
Add your partner team that you will be liaising with.

Insert contact cards into this area.
Internal team
Add your internal team members who are the main drivers to push forward the deal with this customer account.

Populate this area with sticky notes based on the team members defined in the account team owners and stakeholders
Action plan
Chart your team’s ongoing and planned actions for winning this customer’s business.

Deal stage – Copy your deal stages from the previous section above and paste them here.
Opportunities – Link your sales opportunities with the deal stages. Copy opportunity cards from the game plan or add new opportunities here that align with your deal stages.
Next step – Copy the action plan sticky notes from the game plan and list them as the next steps for each deal stage and their respective sales opportunities.
Blockers – List down any blockers with a sticky note, to highlight any issues you may face through that stage. If there aren’t any blockers, leave it as “N/A”.
Internal owner – Copy the sticky notes from the internal team section and paste them here.
External owner – Copy the contact cards from the partner team section and paste them here.
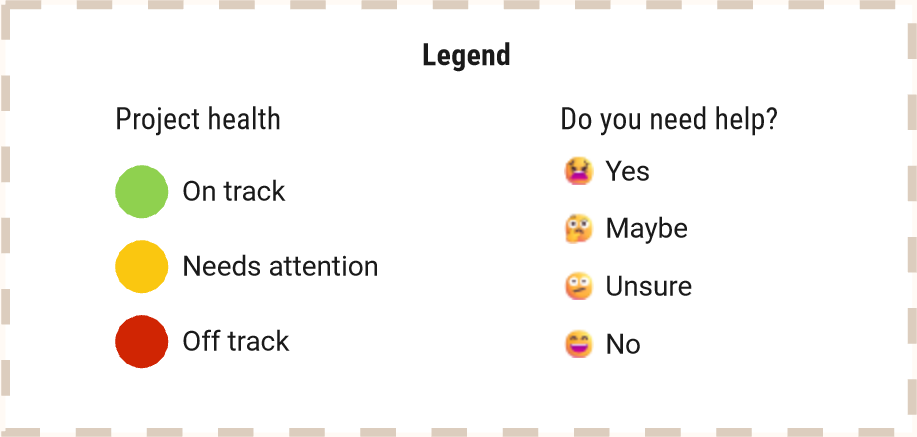
Health status – Use the circle shape with colors to indicate the health status of each of the stages.
On track 🟢: The stage is in a healthy state and is progressing as planned.
Needs attention 🟡: The stage may have faced some hiccups down the road, there is cause for concern but nothing too serious.
Off-track 🔴: The stage has hit a blocker and is unable to proceed as planned. This is urgent and calls for immediate attention.
Do you need help? – Using the health status as a reference, decide if your team needs help or perhaps another round of meetings is required to get the details correct.
Use the legend at the bottom of the action plan table to plot the “Project health” and “Do you need help?” columns.
Step 3: Account map
Hot leads
List down your hot leads and plan how you intend to contact them.
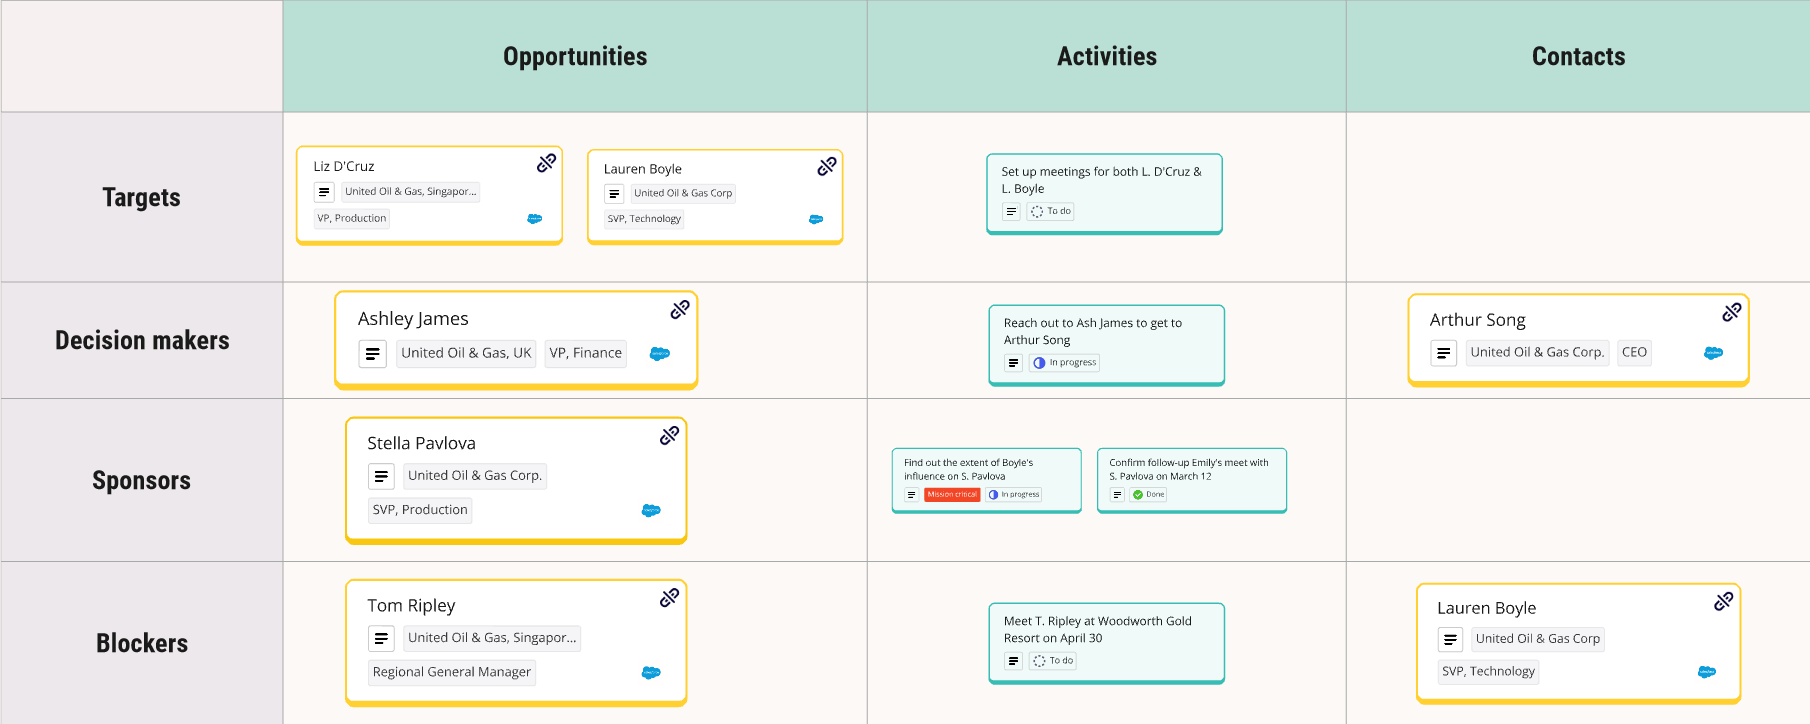
Plot your rows with the following:
Targets – Leads that are your main targets. Normally highly positioned individuals are not easily reachable.
Decision makers – A lead that can help influence the course of a deal.
Sponsors – A lead that is a financial sponsor in the company or organization that provides financial support for your activities or deals.
Blockers – Any leads that are blockers to your progress. Issues that bring work to a complete standstill.
Plot your columns with:
Opportunities – Person of interest that can help you complete or make progress on your deal.
Activities – Plan out activities using Miro cards that involve the following opportunities:
Contacts – Contacts are linked to the opportunities. You may need to explore an opportunity to gain the contact or use the contact to close in on your opportunity.
Account relationship diagram
Plot the diagram with the opportunities and contacts from the hot leads section.
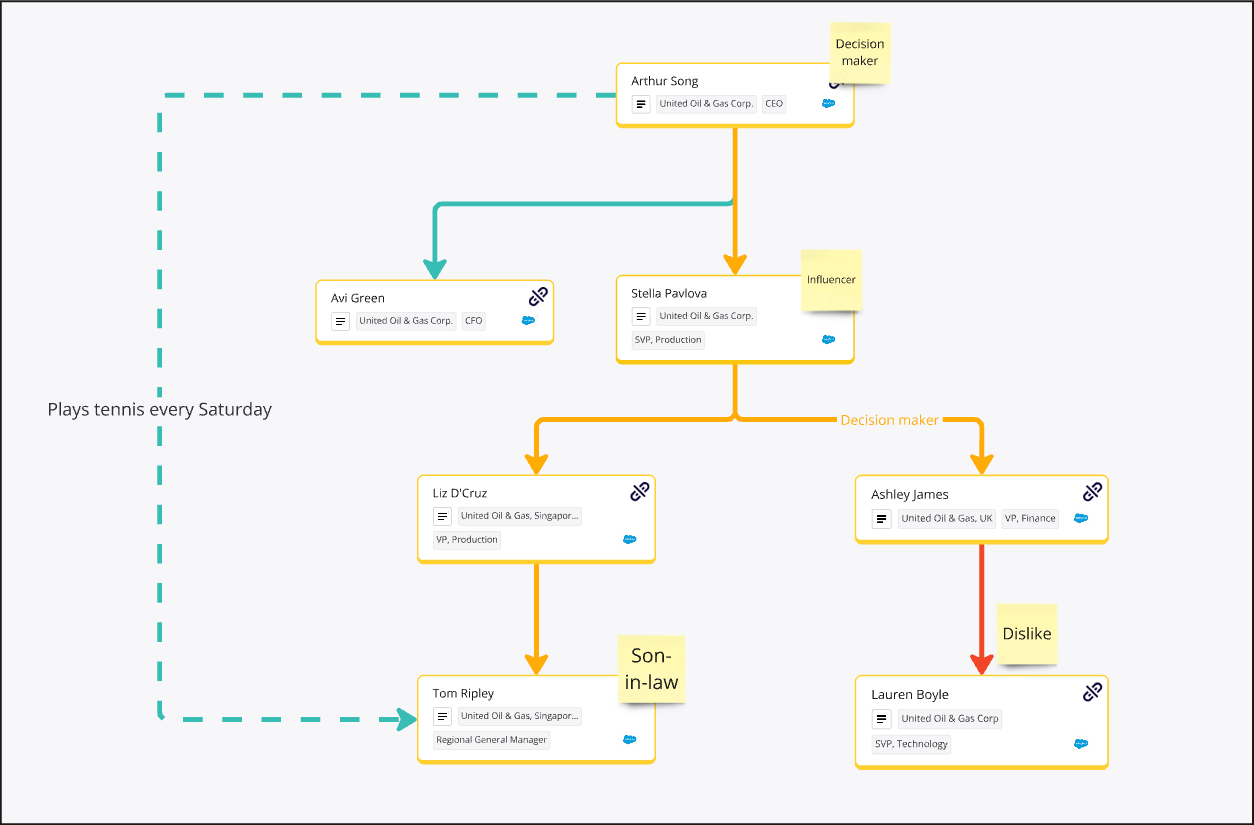
Copy the opportunities cards from the hot leads section and paste them into the relationship diagram
Copy the contact cards from the hot leads section and paste them into the relationship diagram
Combine the colored lines and arrows to define the relationship between one lead to another
For example, “Arthur Song” is connected to “Avi Green” with a green straight line. This indicates that “Arthur Song” is directly reporting to “Avi Green” and both of them have a healthy relationship.
Use the legend at the bottom of the action map diagram to plot the “Relationship health” and “Report” connections.
