
Autodesk for Miro
Redefine 3D design collaboration with Autodesk for Miro, seamlessly integrating Autodesk Forge Viewer with Miro's collaborative platform. Autodesk for Miro will help your team streamline your workflows, enhance visualization, and increase your team's efficiency.
Key features
Import 3D files from Autodesk into the Miro environment.
Get 3D file previews and obtain a quick, comprehensive overview of your designs in your Miro board.
Get the Forge Viewer experience in your Miro boards; explore and interact with 3D models in Miro.
Set 3D images at different angles in your Miro board for presentation purposes.
Prerequisite
Autodesk Platform Services or BIM 360 account.
Installing Autodesk for Miro
Go to Miro Marketplace and search for “Autodesk for Miro”.
Select the app and click Connect.
Select the team of your choice from the dropdown menu and click Add.
Authorizing Autodesk for Miro
Here’s how to authorize the connection between your Miro and Autodesk accounts:
Log in to https://acc.autodesk.com.
At the top left, click on Account Admin > Custom Integration. Then, click +Add custom integration.
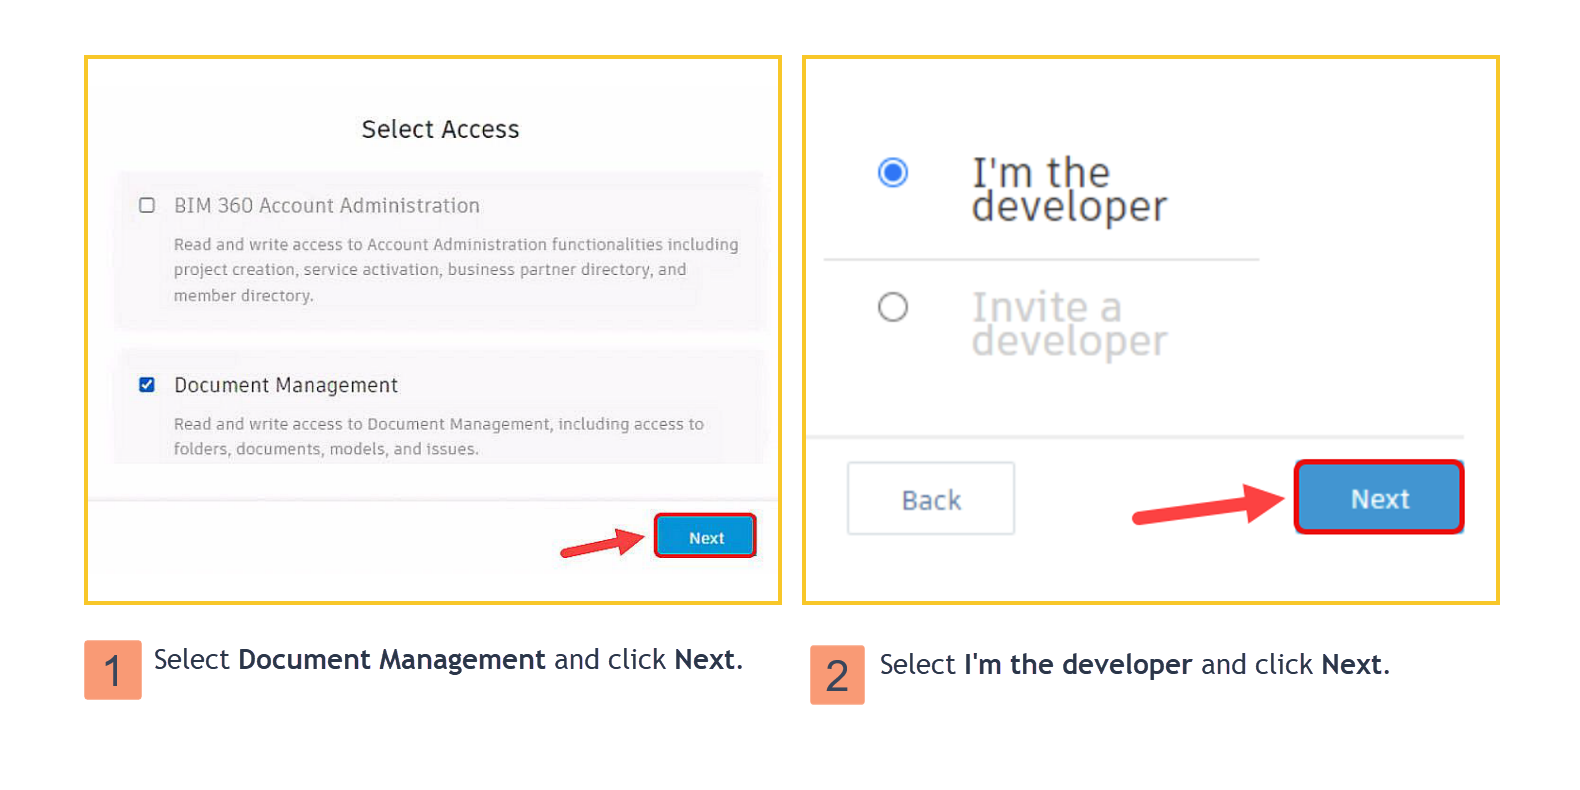
Depending on the product, you may be directed to the page shown in the image below. Select Document Management and then click Next. Then, select I’m the developer and click Next.
If you do not see this page, skip to step 4.
You will be prompted to give the Autodesk Platform Services Client ID (or Forge Client ID). Copy and paste the following in the field:
CODEQhJjqIvo2O9FEGMdoVBXv9uALd92ehdEVwxGw8b4BcoihADl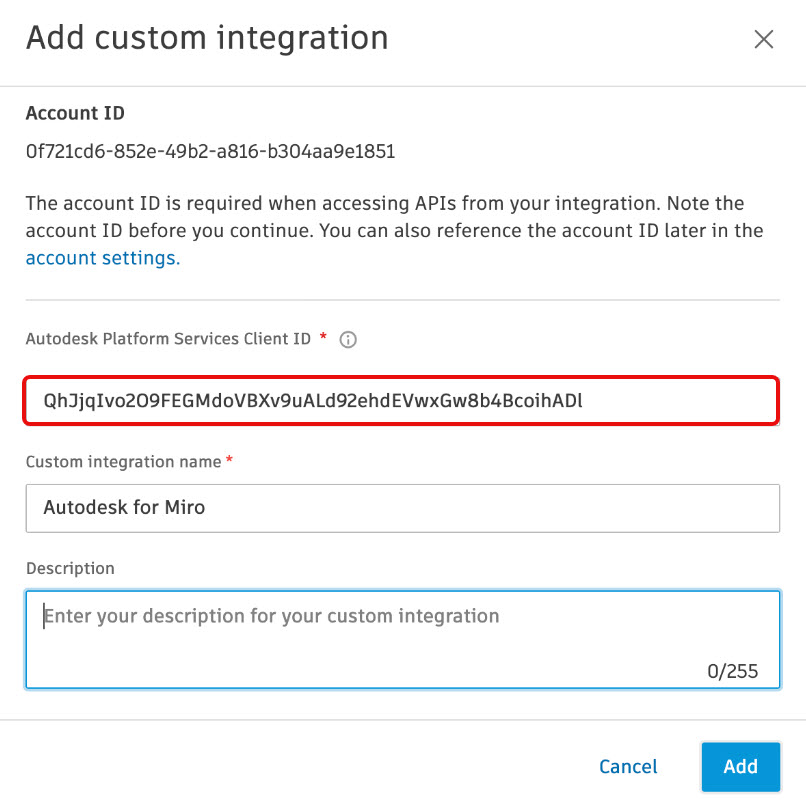
Click Add.
Head to Miro and on the toolbar, click on the Autodesk for Miro icon. (If you do not see the icon, click
 and search for “Autodesk for Miro” and select it.)
Accept the permissions.
Sign in to your Autodesk account.
A pop-up will appear, requesting you to allow the connection. Click Allow to authorize the application.
Importing 3D images from Autodesk to Miro
In Miro, click on the Autodesk icon in the toolbar.
This will bring you to the Autodesk Forge Viewer, you will see a menu on the left. Click the hamburger menu to view your team’s menu tree.
Expand the file tree and select the files you want to import to Miro or search for it in the Search tab. Then, click Import.
When you import multiple files at once, there won’t be a preview of the images.
The Miro board will import your 3D images. You can now move the image around, rotate it, and more.
Using advanced mode features
Autodesk for Miro has an advanced mode where you can use additional features. Here’s how you can activate the advanced mode:
Select an imported object.
Click the Autodesk icon on the Miro toolbar to trigger advanced mode.
In this mode, you will see an advanced mode toolbar. Here’s what each button of the toolbar can do:
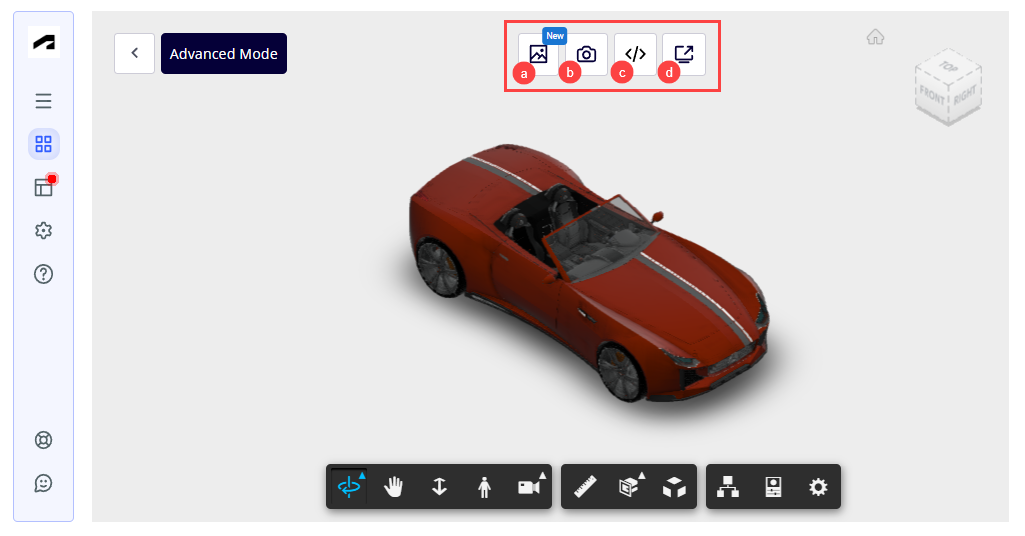
Update thumbnail
Capture a screenshot of the object
Embed a file
 This will create a duplicated iFrame window at a different angle.
 Open the file in a new tab
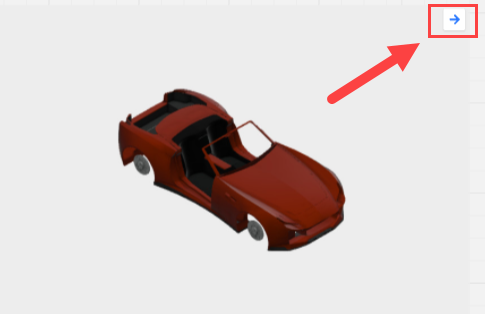
Click the arrow in the screenshot's top right on the Miro board to return to the original file.
Security statement
ServiceRocket is committed to the protection and security of our customers' information. Learn more about Autodesk for Miro’s security practices in our security statement.
Knowledge base
Have questions? Check out our knowledge base for quick answers and helpful tips!