Customizing Salesforce Card fields
This feature is only available to users on a free trial or an active subscription of any paid plan, including Standard, Advanced, Premium, and Enterprise.
This feature lets users customize their Salesforce Card by selecting preferred columns and editing specific fields directly.
Open the app from the side panel.
Click the gear icon (⚙) to access Settings.
Click on the Display > Salesforce Card.
Select a Salesforce object card to customize.
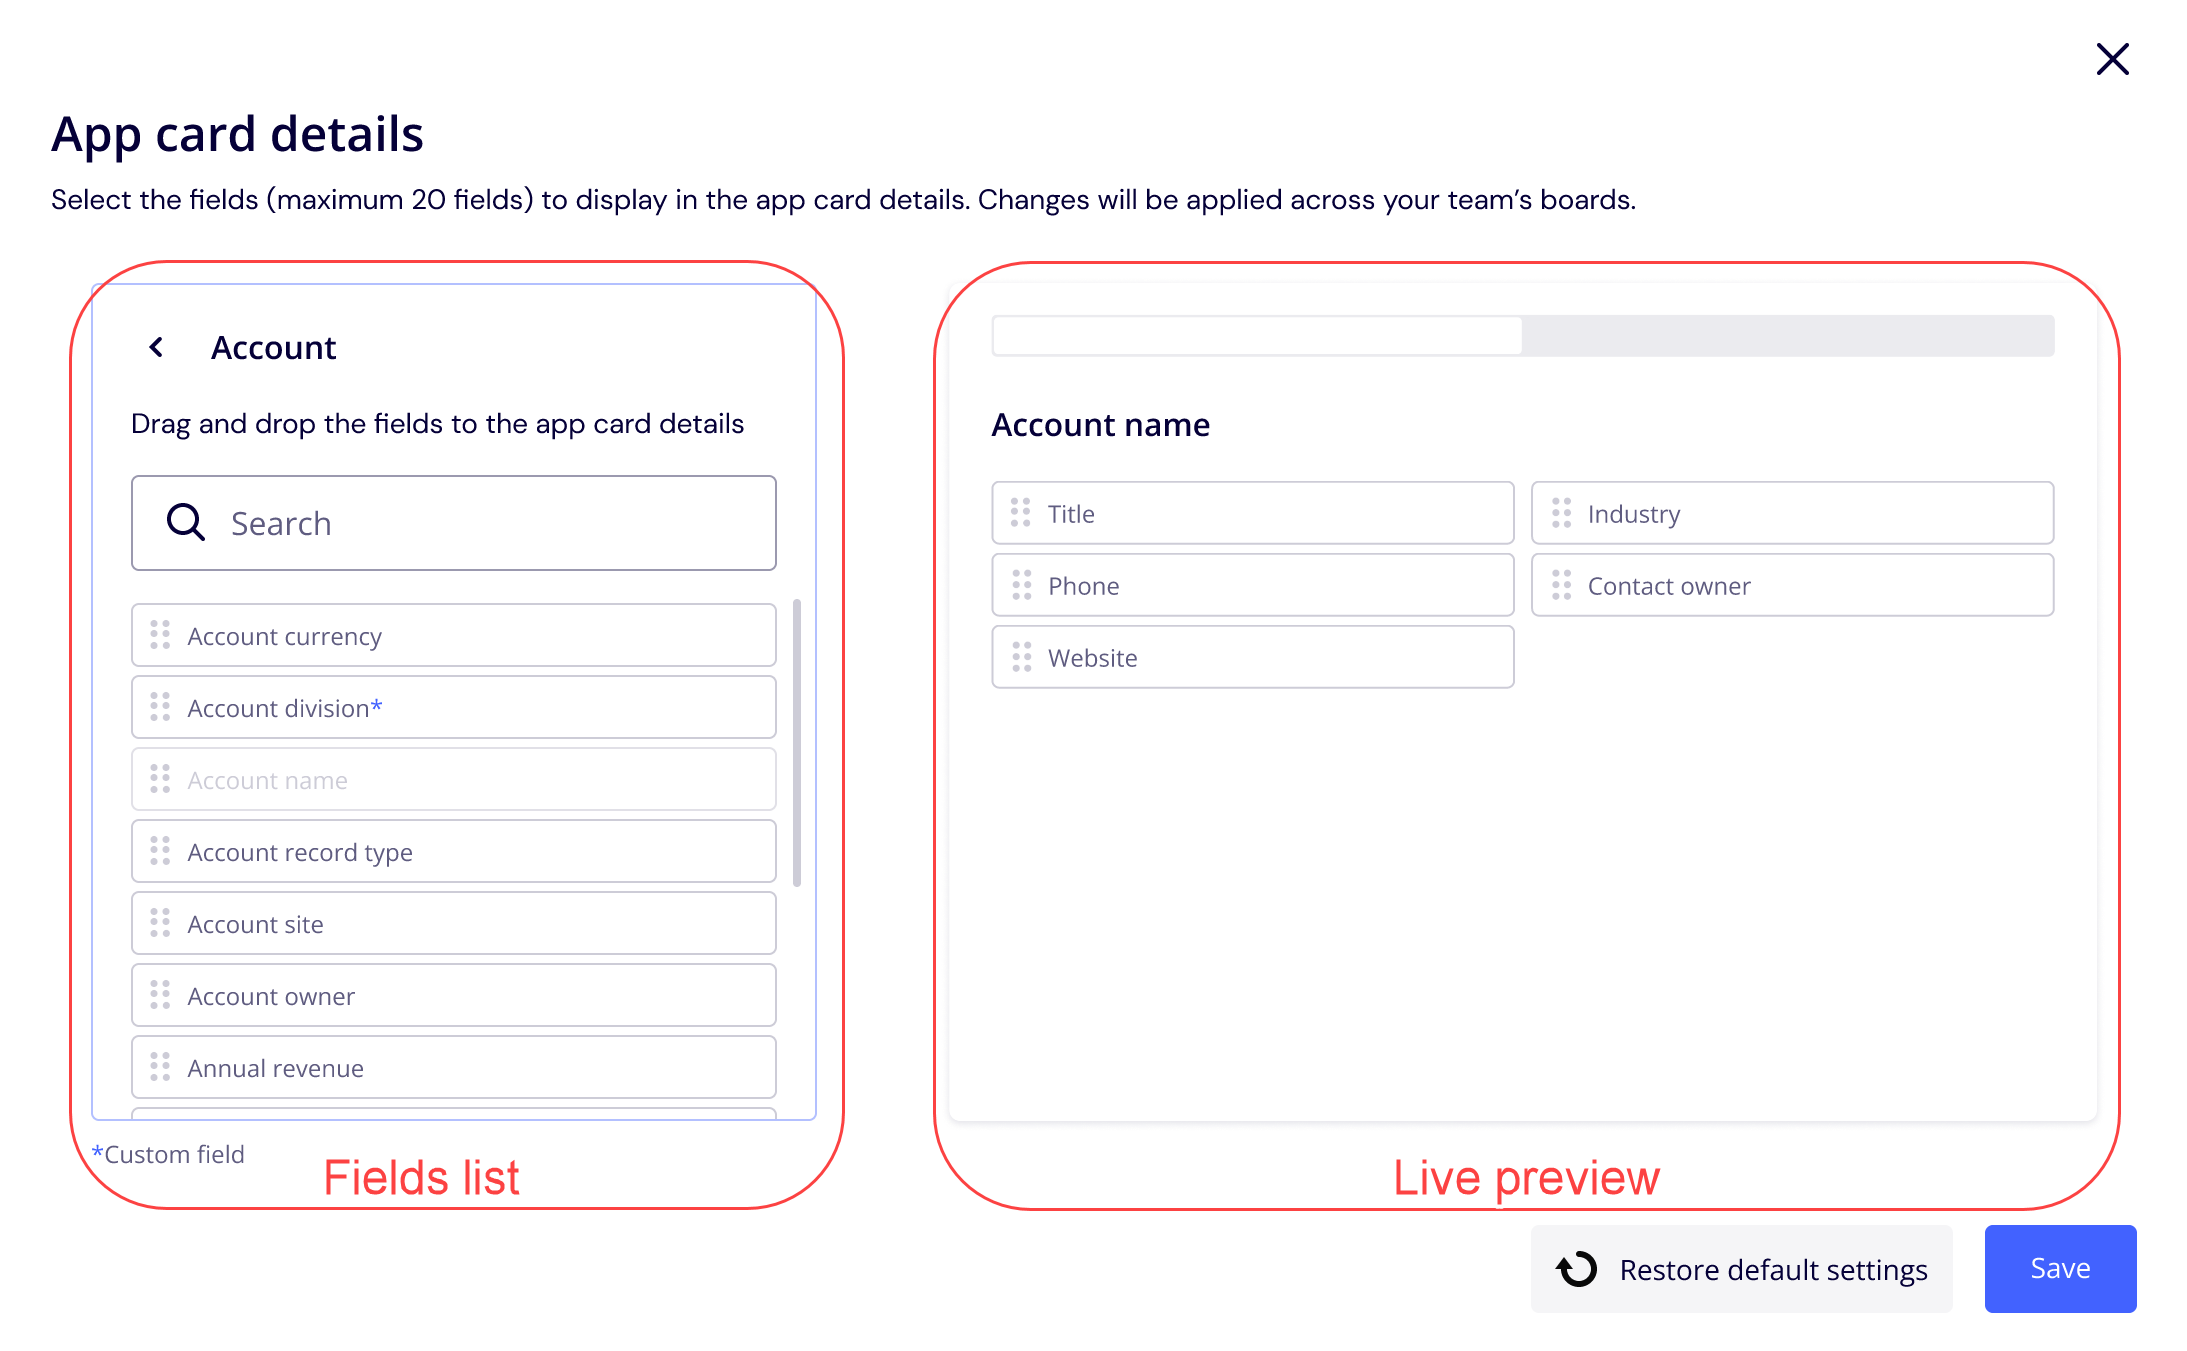
In the Salesforce Card display, there are two sections:
Fields list: The user can search for the field by the field’s name or select from the fields list(organized in alphabetical order)
Live preview: The Salesforce for Miro app sets the default displayed fields. The live preview will reflect those changes if the user has previously customized the fields.

You can drag and drop fields from the fields list and arrange them in the live preview.
The maximum amount of fields that can be displayed in the live preview is 20.
Click Save to confirm the Salesforce Card field customization. A window will appear to confirm your decision. Click Yes.
You may encounter “Out-of-sync field detected.” messages. An out-of-sync field is a field missing in the objects (e.g., a field deleted by the Salesforce Admin in the Salesforce instance).
You can still save the Salesforce Card fields with these missing fields.
Upon successful confirmation, you’ll receive a success message indicating the changes have been applied.
If you click Restore default settings, the fields display will be reverted to the default Salesforce Card fields.
Check out our knowledge base to learn which field types are supported in the Salesforce Card fields.
