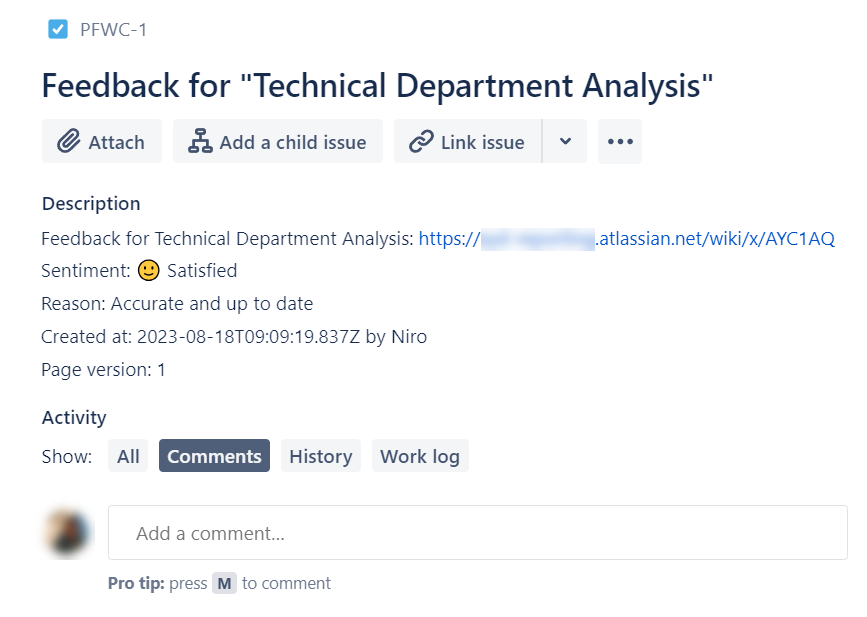
Webhooks are only triggered when a user selects a reason. If a user only provides a sentiment, the webhook will not be triggered.
You need to be a Jira administrator or a project administrator to perform these steps.
-
In Jira, select a JSM project.
-
Click Project Settings > Automation > click the Create rule button to start creating the automation rule.
-
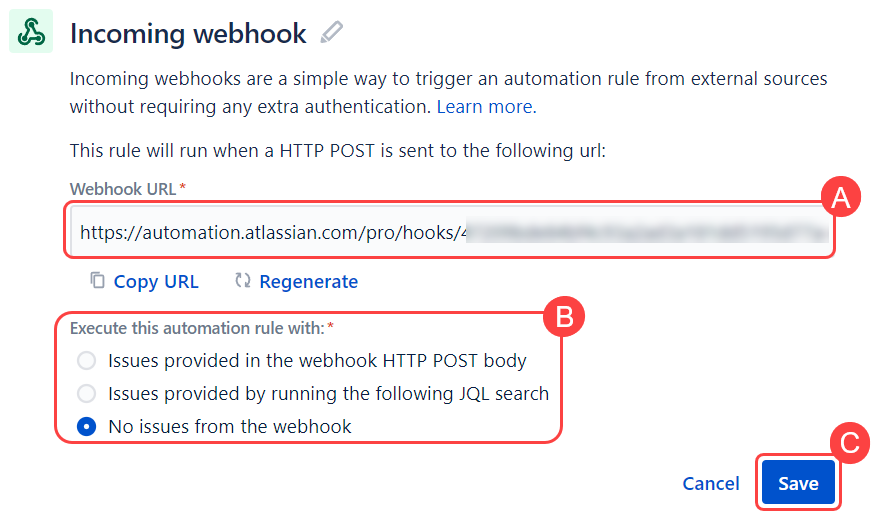
In the Create a Trigger section, search and select the Incoming webhook option.
-
Click Copy URL to copy the automation webhook URL.
-
Next, select the “No issues from the webhook” option from the Execute this automation rule with section. Then, click Save.
-
For the New component section, select THEN: Add an action.
-
Search and select the Create issue option.
-
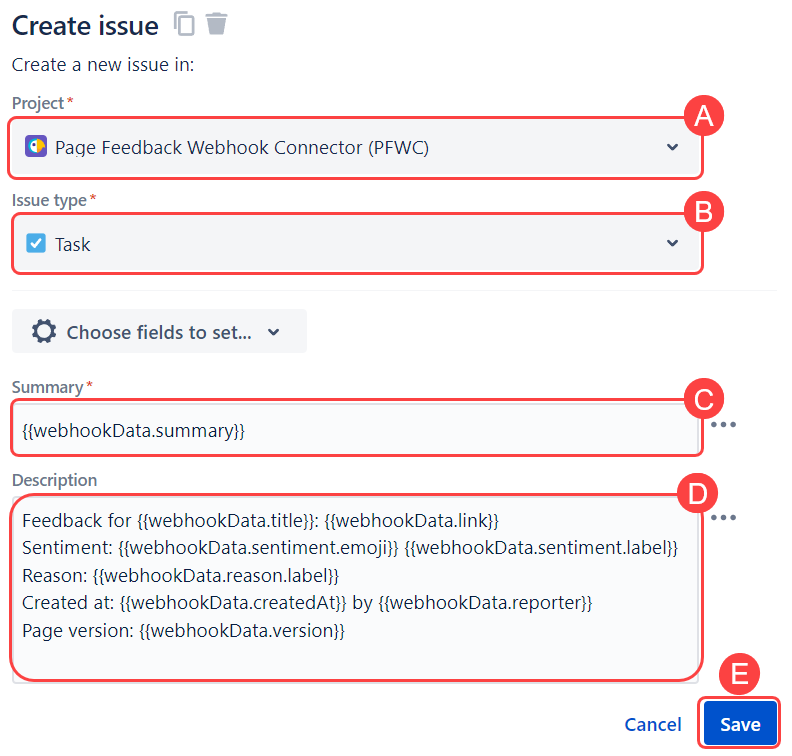
Enter the following for the Create issue section:
-
Project - select a project.
-
Issue type - select an issue type.
-
Summary - enter the following in the Summary field:
{{webhookData.summary}} -
Description - enter the following in the Description field:
Feedback for {{webhookData.title}}: {{webhookData.link}}
Sentiment: {{webhookData.sentiment.emoji}} {{webhookData.sentiment.label}}
Reason: {{webhookData.reason.label}}
Created at: {{webhookData.createdAt}} by {{webhookData.reporter}}
Page version: {{webhookData.version}}
-
-
Choose other fields to set up if you want to. Then, click Save.
-
Name your automation and set the permission access to edit the rule. Next, click Turn it on to activate the automation.
-
In Confluence, go to any space > click Space Settings > under Integrations, click Page Feedback Webhooks.
-
Click Add Webhook, enter a webhook into the Label field, and paste the copied link from Step 4 into the Webhook URL field. Then, click Save.
-
You have successfully created an endpoint from your Confluence space to your Jira project.
-
An issue will be created in your Jira group when a user provides feedback in a Confluence space.