
GitHub for Miro
GitHub for Miro will enable you to integrate both platforms and streamline your workflows. By leveraging the strengths of these apps in a cohesive working space, you’ll be able to improve efficiency and collaboration.
Key features
GitHub for Miro allows you to:
Import issues from GitHub and place them in Miro as app cards.
Create GitHub issues from Miro.
Convert Miro sticky notes into GitHub issues using app cards.
Installing GitHub for Miro
Any user can install GitHub for Miro to a Miro team. However, admins can restrict non-admins from adding apps if they're on Miro's Business or Enterprise Plan. To learn more, you can check out Can non-administrators install apps?
Go to Miro Marketplace and search for “GitHub for Miro”.
Select the app and click Connect.
Next, allow permissions for GitHub for Miro by clicking Allow.
Authorizing GitHub for Miro
Open a Miro board in your team space. At the toolbar menu, search for “GitHub for Miro” and click on the icon.
On the consent form, Check Yes, I understand and agree to both options and click Continue.
Finally, select the GitHub account you’d like to connect to and click Save changes.
That’s it! The GitHub connection is now authorized.
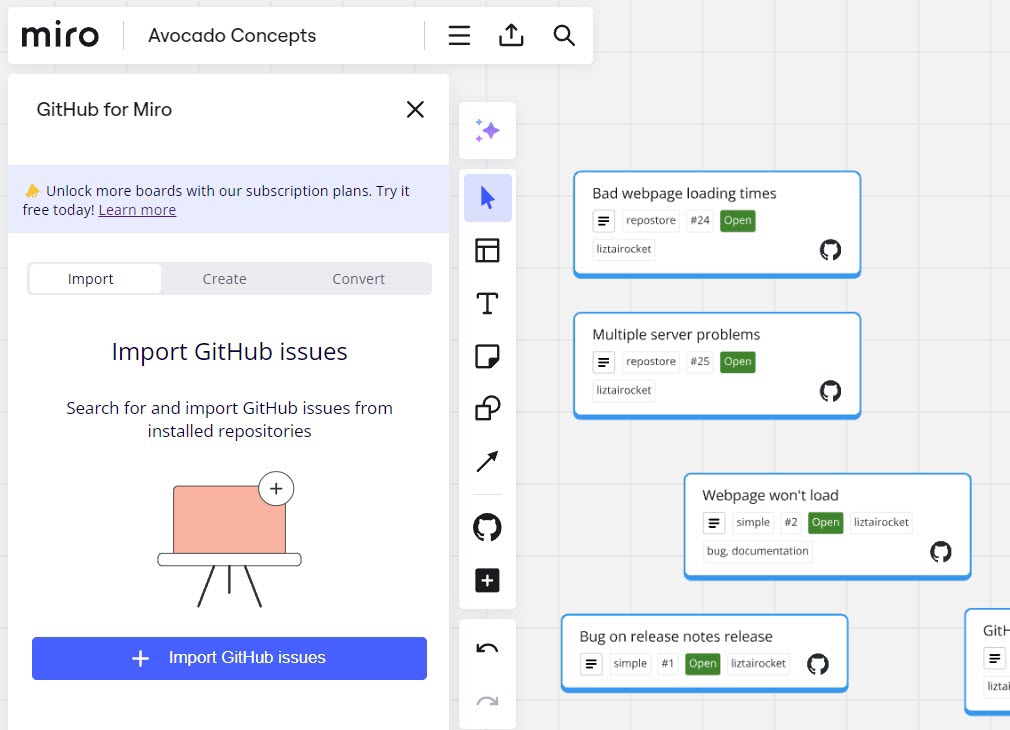
Importing GitHub issues
Click on the GitHub for Miro icon on the toolbar.
Open the Import tab and click on the +Import GitHub issues button.
Select the repository and then the issues you’d like to import, and click the Import button.
The GitHub issues will now appear as Miro app cards.
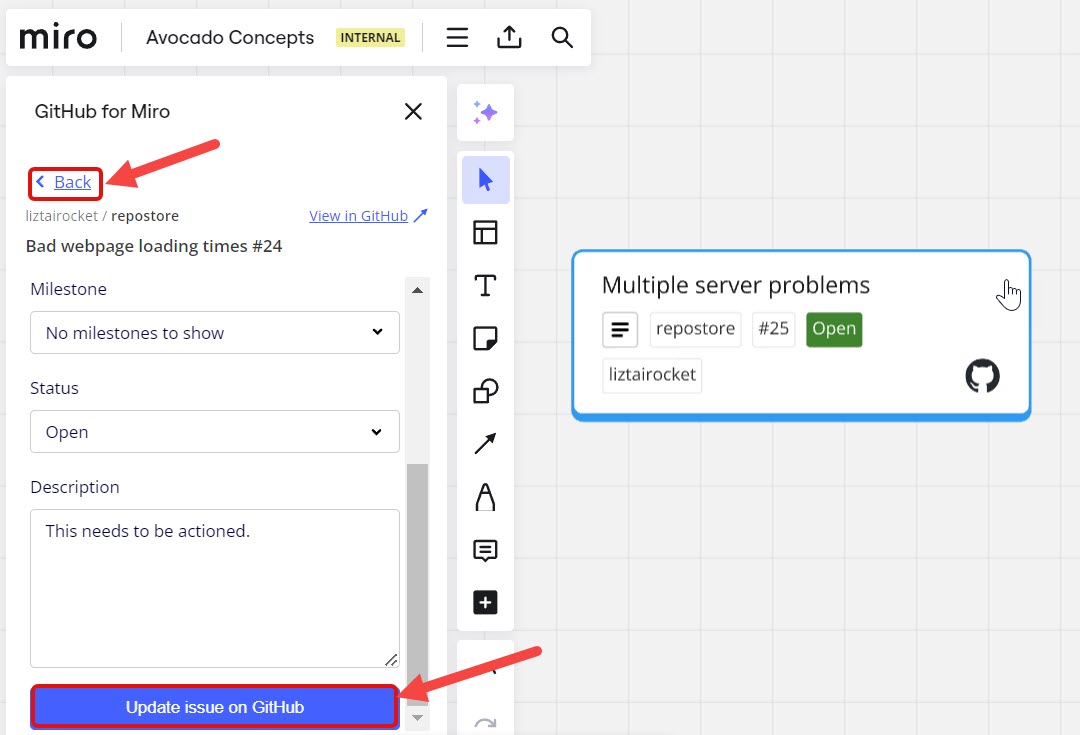
You can expand the app card to view or edit the issue’s details. Once you’ve edited the issue, click Update issue on GitHub or click Back to return to the Miro board.
Creating GitHub issues
Click on the GitHub for Miro icon on the toolbar.
Open the Create tab.
Fill out the form with the relevant information:
Repository - The repository to house this issue.
 The repositories listed in the dropdown menu will be associated with the default GitHub organization you’ve chosen when configuring the app.
Issue title - The title of the issue.
Assignees - The users you want to assign the issue to.
Labels - The issue’s associated labels.
Milestone - The issue’s current milestone.
Description - What the issue is about.
Once you’ve completed the form, click Create issue.
An app card will be created in Miro and a corresponding issue will be created in GitHub.
Converting Miro sticky notes into GitHub issues
Create a sticky note on your Miro board and select it.
Click on the GitHub for Miro icon from the toolbar and then click on the Convert tab.
If you have multiple repositories connected, select one where the issue will be created.
Fill out the form with the relevant information:
Repository - The repository you want to push this Miro card to.
The repositories listed in the dropdown menu will be associated with the default GitHub organization you’ve chosen when configuring the app.Issue title - The text from the Miro app card will be automatically included here.
Assignees - The users you want to assign the issue to.
Labels - The issue’s associated labels.
Milestone - The issue’s current milestone.
Description - What the issue is about.
Click Convert issue to GitHub once you’ve completed the form.
The sticky note will be converted into an app card and a GitHub issue will be created in GitHub.
You can visit the related GitHub issue by clicking on the link in the detailed view of the app card. To see more detailed information on the Miro app card, click the expand icon on the top right of the card.
You can also convert multiple issues by selecting multiple sticky notes at once and clicking on the Convert tab. However, the app cards and GitHub issues created will share the same information that you’ve filled out in the form in Step 3 and 4.
Security statement
ServiceRocket is committed to the protection and security of our customers' information. Learn more about GitHub for Miro’s security practices in our security statement.
Knowledge base
Have questions? Check out our knowledge base for quick answers and helpful tips!