Conducting a CAD design review
What is a design review?
During a design review, architects, engineers, and clients come together to assess and improve a design. This collaborative process will ensure that potential issues are uncovered and that the design meets all the requirements and aligns with the project’s goals. Participants provide feedback, discuss concerns, and make revisions as needed before the design is finalized.
Overview
The CAD design review template breaks down the design review process into four major frames to help you effectively manage and evaluate your designs.

We recommend creating one board for each design project you are reviewing.
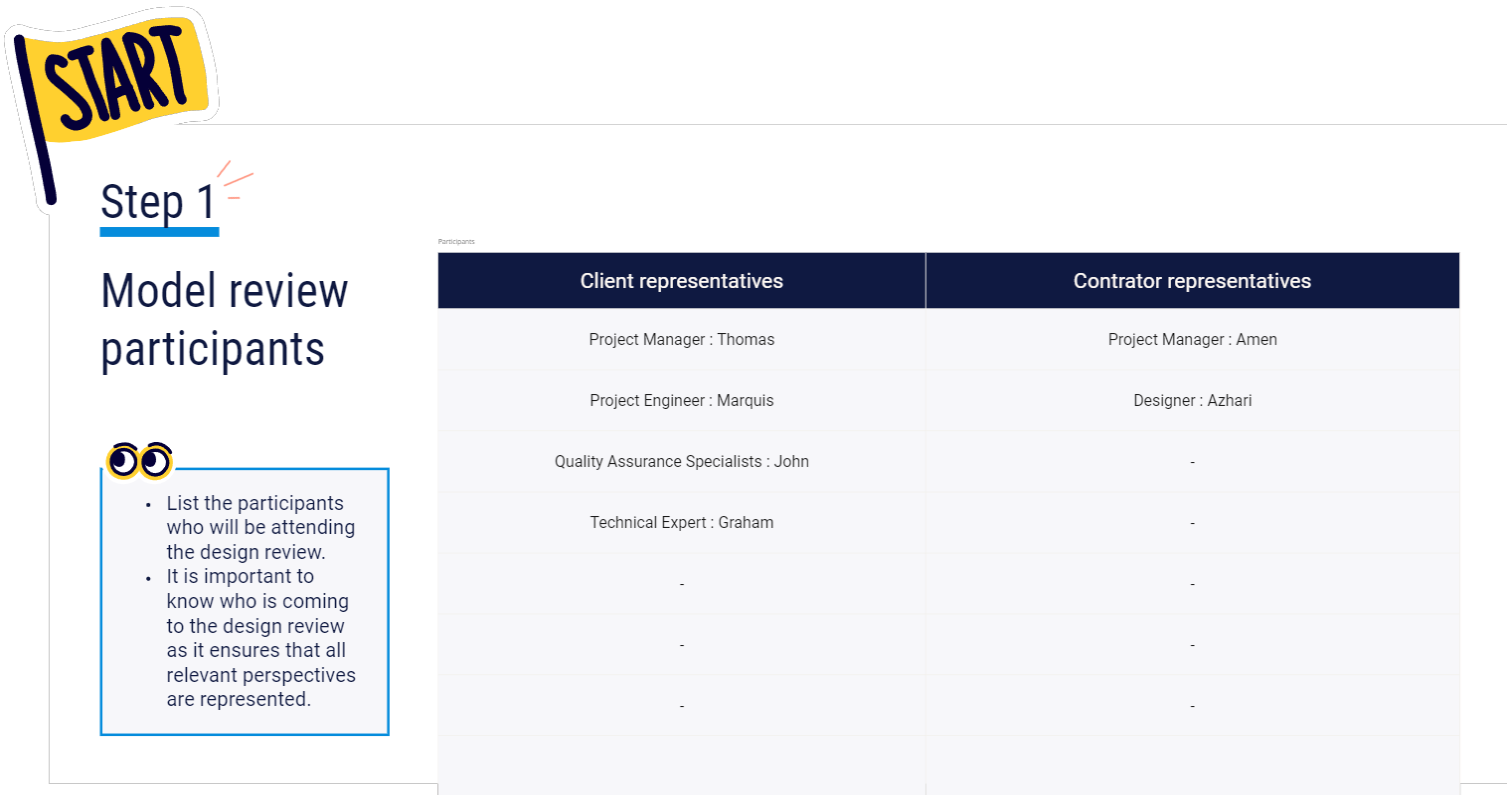
Model review participants
List the participants who will be attending the design review.
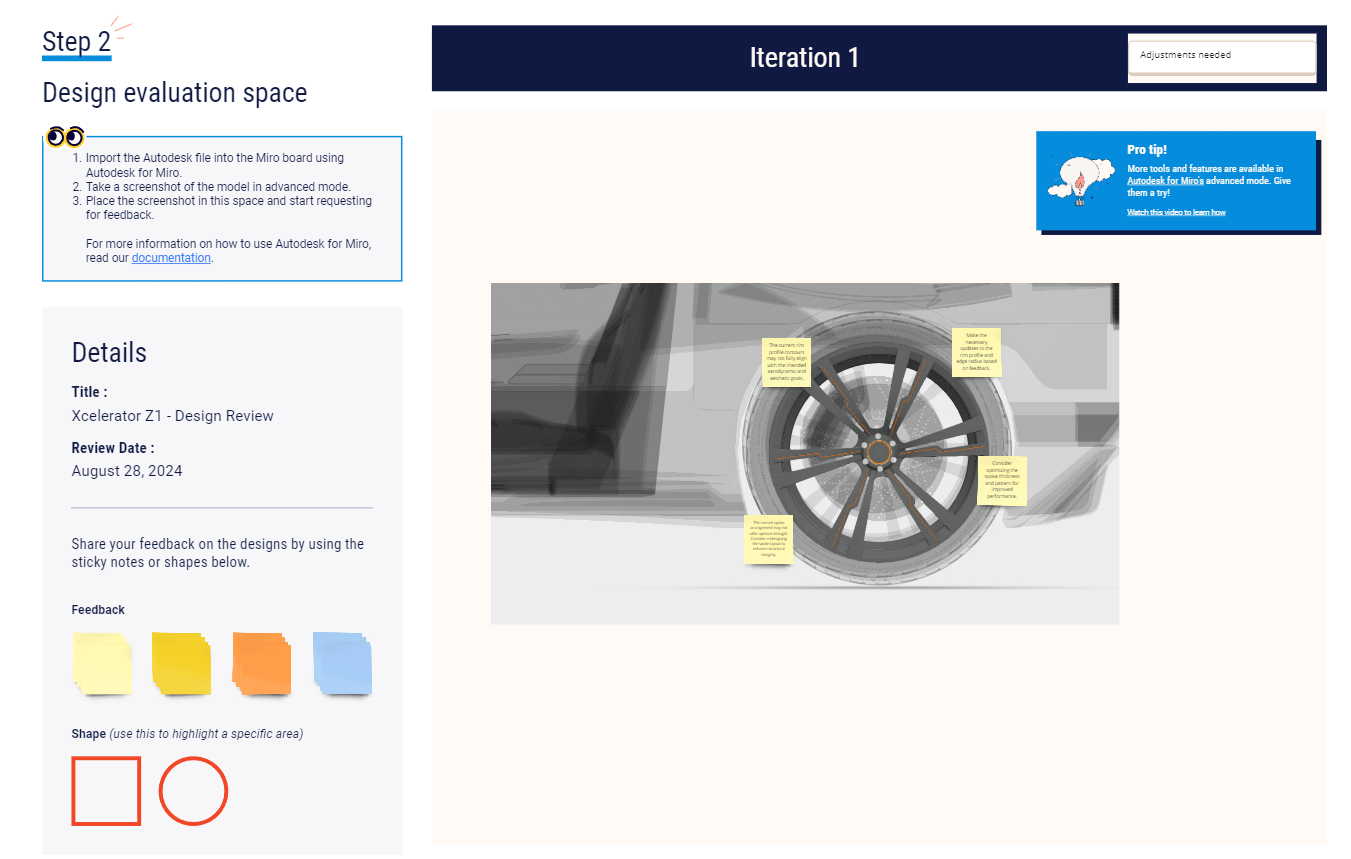
Design evaluation
Highlight your designs and receive feedback from stakeholders here.
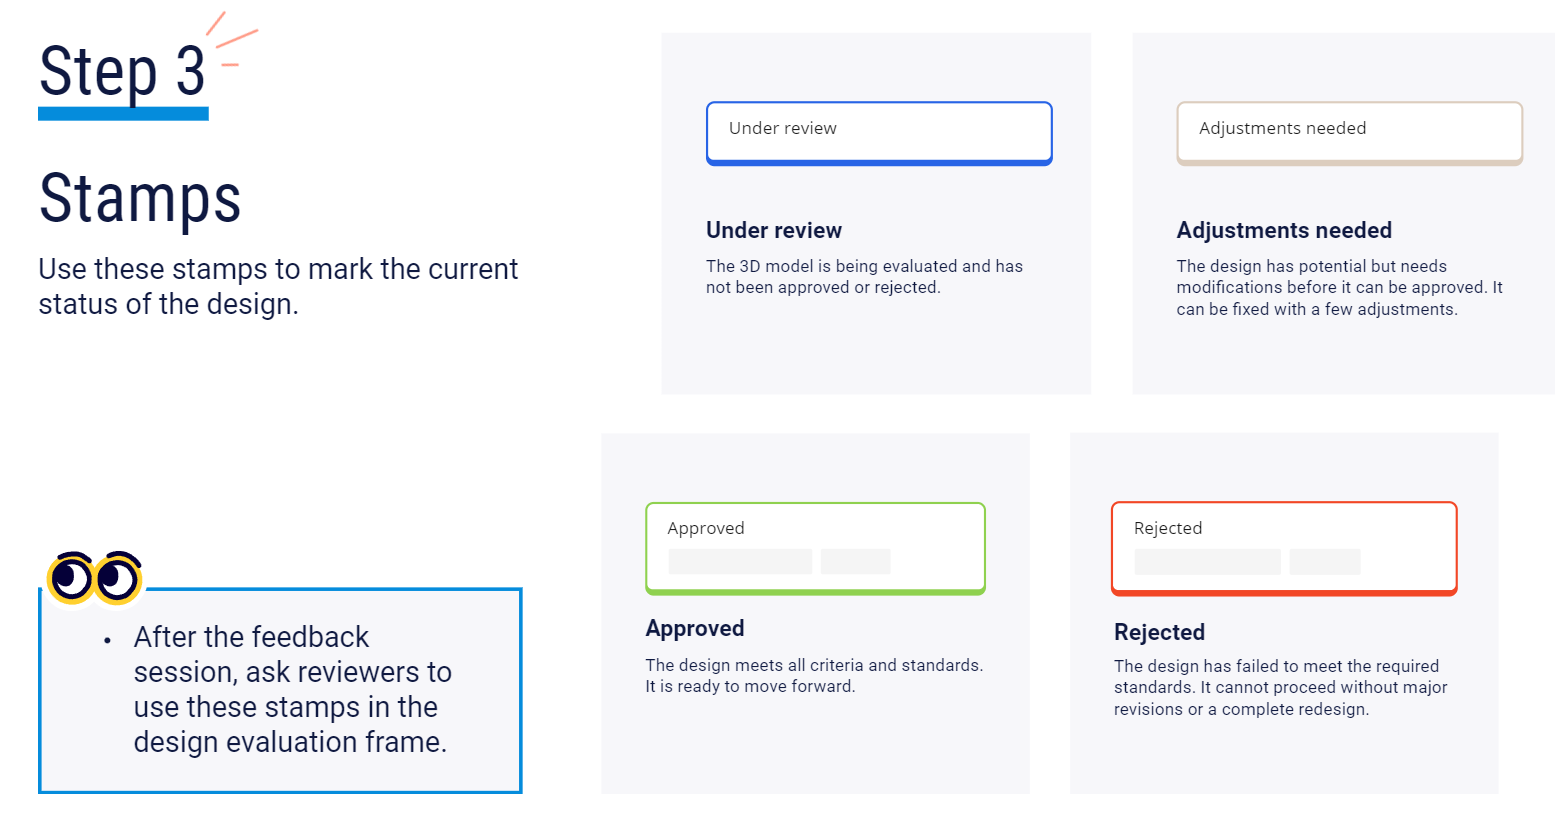
Stamps
Use stamps to indicate if the design is approved, rejected, needs adjustment, or is still under review.
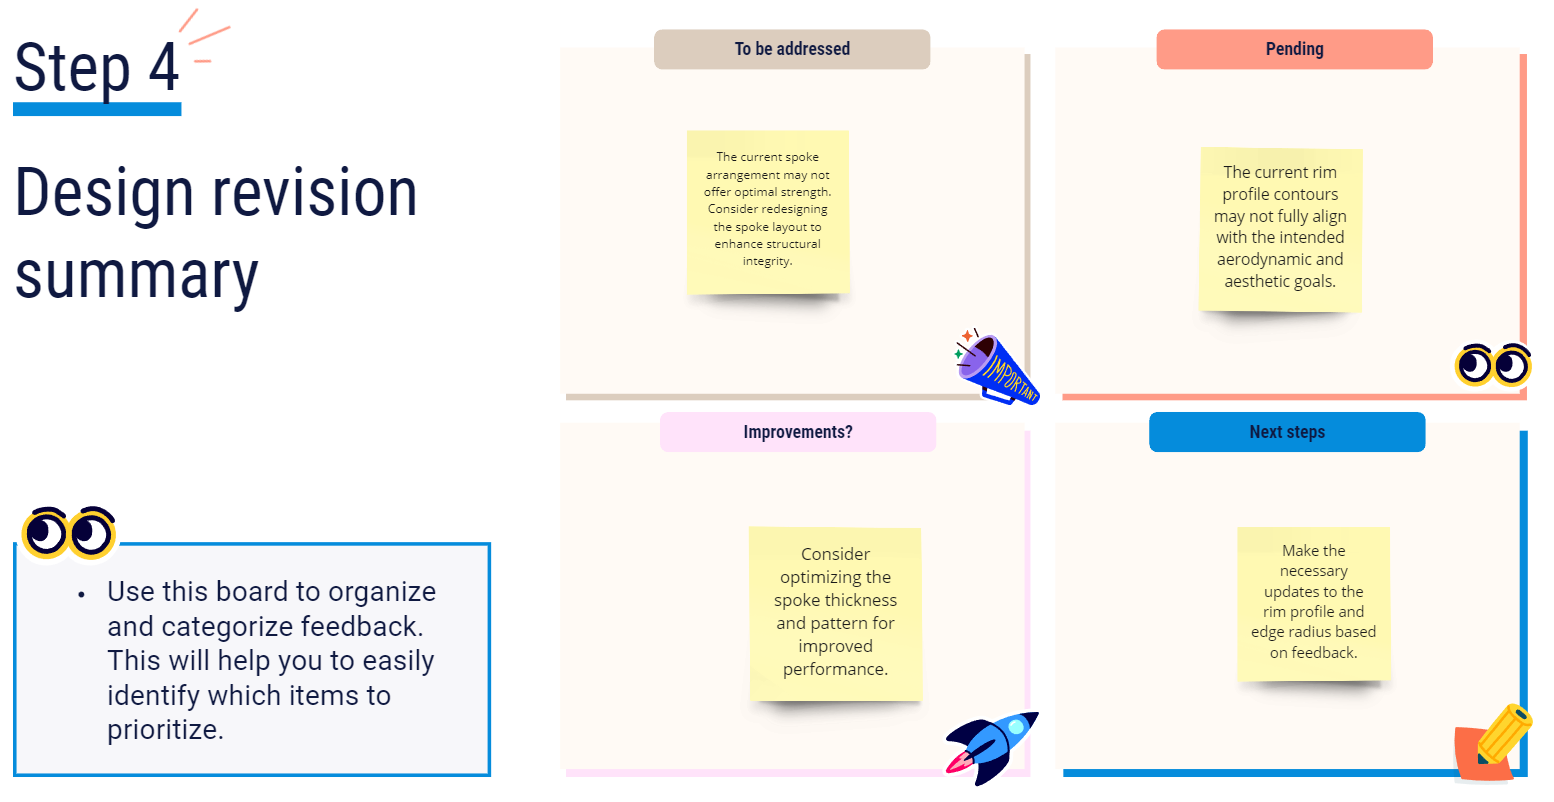
Design revision summary
Categorize your feedback to prioritize tasks, track progress, streamline communication, and enhance efficiency.
Why use the template?
Comprehensive design reviews improve the understanding of project requirements and facilitate effective adjustments to meet goals. Here are some of the benefits you’ll get from using this template:
Document stakeholder feedback
Gather feedback in one place to facilitate efficient design revisions.
Communicate the design’s status
Know what has been completed, what is in progress, and what is pending.
Maintain a clear record of decisions
When you properly record and update design documents, feedback, and decisions, the documentation will serve as a reference for future reviews and decisions.
Create an action plan and assign tasks
Identify, list and assign tasks to team members or departments with clear instructions on what needs to be done.
Track how the design has progressed over time Note down key changes and improvements to understand the rationale behind decisions and for future projects or reviews.
How to use the template
Step 1: List down design review participants

Document the list of participants who will be attending the design review in this panel. For example, you can list representatives from the clients' and contractors' side.
Tip: When you know who is participating in a design review, you can determine if all relevant perspectives are represented.
Step 2: Review models with the design evaluation space

Import the Autodesk files to Miro with Autodesk for Miro.
Take a screenshot of the model in advanced mode.
Place your designs for review in the design evaluation space and request for feedback.
Stakeholders can use sticky notes or shapes to write their thoughts or highlight areas needing improvement or changes.
Step 3: Mark the current status of designs with stamps

“Stamp” your design to indicate its status. For example:
Under review – the model is being evaluated
Adjustments needed – the model needs to be revised
Approved – the design has met all criteria and can move forward
Rejected – the design has failed to meet requirements and must go through revisions or redesigned
Stakeholders can drag stamps into the design frame in Step 2 to indicate the design’s status.
Tip: Include a name and date on approved or rejected stamps to document when the decision was made and by whom.
Panel 4: Summarize your design revision efforts

Document the important information from the design review here. For example, compile feedback into categories such as what needs addressing, what is pending, improvements, next steps, and action points.
