Create a Venafi certificate
This page covers the creation of a Venafi certificate via a typical request form on Jira Service Management.
Requirements
- A valid self-signed Certificate Signing Request (CSR). For more details, go to this Venafi page.
- Venafi project name(s) and zone name(s). This information can be provided by your IT support department or IT administrator.
Guide
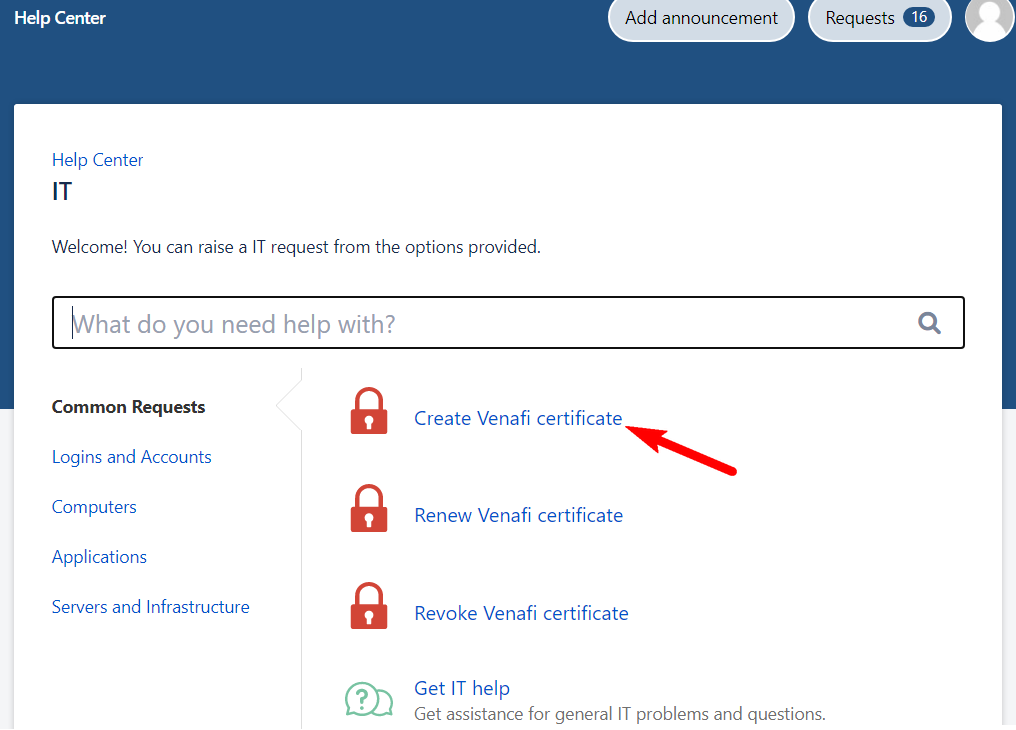
- Open your company's IT service desk or IT support web page. In this example, the Venafi-related forms can be seen on top. Click on Create Venafi certificate.
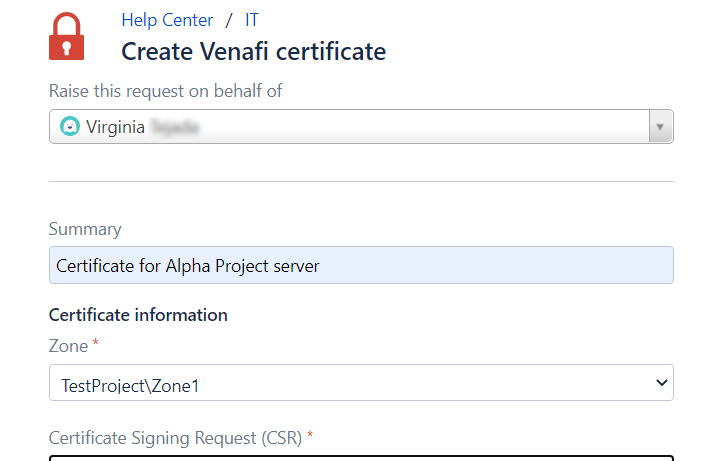
- Select the user, then type in a brief summary of the certificate request. Under Certificate information, select the Zone where it will be used.
Paste in the Certificate Signing Request (CSR) and click Create.
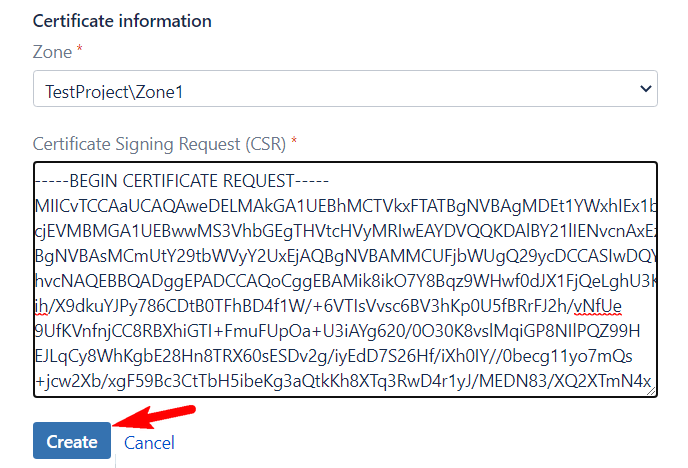 Make sure you paste in your CSR and not your private key. A private key will start off with a phrase which looks like ---BEGIN PRIVATE KEY---.
- Submit the JSM request. The request will go through the workflow set by your JSM administrator.
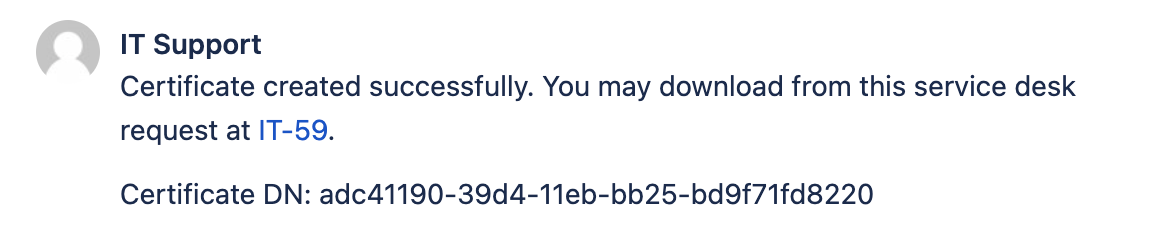
- If the request is successful, you may see a comment to download the certificate.
Download the certificate from the Certificate information available in the JSM ticket description: